by Softleitner
read manual online at
https://citybuilder.softleitner.com/manual
for support please contact
softleitner@gmail.com
- Overview
- Release Notes
- Demos
- How To
- General
- Systems
- Other
Overview
permalink: /manual title: “Overview” sidebar: title: “Manual” nav: manual —
Welcome
This is the manual for Classic City Builder Kit by SoftLeitner. Classic City Builder Kit is quite the mouthful so I will be referring to it using the shorthand CCBK.
Oldschool walker based City Builders are very systems heavy games that require lots of tweaking and balancing to get right. CCBK was created with the aim of providing all the common tropes of the genre and making them easily accessible in the Editor.
The kit was created with the classic evolve housing, build monuments type of game in mind and most of the systems are commonly seen in that genre. That being said large parts like Buildings, Items, Walkers and Layers are general enough to create a wide variety of games.
This manual includes overviews of the demos, how to pages and explanations for all the major systems. More detailed explanations of individual components, interfaces and methods can be found directly in the code of the asset as xml headers and comments. These are also found in the online API documentation reached by clicking the ? button on any CCBK component in the unity inspector. Quick descriptions of most scenes in the asset can be displayed by clicking the About button in the scene view.
Project Structure
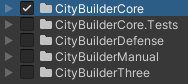
CCBK is separated into multiple assemblies. Which ones you need depends on how you are planning to use the Kit. For your first exploration create a new project and remove the example assets and materials, then import the entire asset. Importing project settings is optional except for TagManager if you want to run the demos.
-
CityBuilderCore
The Core Framework of CCBK, always import this one. -
CityBuilderCore.Tests
Contains various automated and manual testing scenes for CityBuilderCore.
Can be useful to explore how various systems work and how they are set up. -
CityBuilderDefense
Contains the 2D Tower Defense demo
Import if you want to start by adapting this demo. -
CityBuilderManual
Holds completed samples of the HowTo section of this manual.
Import if you’re stuck on a how to or exploring. -
CityBuilderThree
Contains the 3D City Builder demo
Import if you want to start by adapting this demo.
For the menu to work add the Menu, StageOne, StageTwo, StageThree scenes in Build Settings. -
CityBuilderTown
Contains the 3D Colony Sim demo
Import if you want to start by adapting this demo.
For the menu to work add the TownTitle and TownHills scenes in Build Settings. -
CityBuilderTown.Tests
Contains some automated and manual testing scenes related to the town demo. Can be useful to explore how some of the specialized town demo systems work. -
CityBuilderUrban
Contains the 2D City Sim demo
Import if you want to start by adapting this demo.
Most demos depend on either layers, tags or sorting layers. If these settings were not set during import please copy the contents of TagManager.txt from the demo folder to the TagManager.asset in you ProjectSettings.
Dependencies
- URP is used by default but none of the logic is tied to it(see CityBuilderCore/Settings)
- New Input system is used for input by default but can be removed(see CityInputActions)
- The demos depend on TextMeshPro for their UI
- Both 2D and 3D variants depend on 2D Tilemap Editor
Usage
After familiarizing yourself with CCBK you should be ready to start your project. I’ll outline three basic levels of usage for CCBK here. The first two don’t require any coding, implementing custom systems assumes basic knowledge of C#.
-
Adapting one of the Demos
Is one of the demos close enough to what you are trying to achieve? Great!
Import it along with CityBuilderCore and the Settings and start tweaking. The content of the demos is explained in detail in the 3D City Builder and 2D Tower Defense manual pages. -
Starting from Scratch using Core Logic
If none of the demos gets close enough to what you want to make or you want to make sure you understand every piece of your project starting from scratch is the way to go. Continue Here for a step to step guide to creating a city builder purely in Unity Editor. -
Implementing Custom Logic
Need some special sauce in your game and know basic C#. Continue Here for a step to step guide to extending CCBK with your own components and systems.
Render Pipeline
The core framework is no tied to any render pipeline. The demos, example and test scenes use URP for their visuals since update 1.10.0. Most materials should convert fine using the Unity converter. All custom shaders that were previously used in BIRP are still contained in the asset. Most prominently ThreeMap and ThreeMapRoad in CityBuilderThree/Materials/Shaders which are used for Map and Road materials. Trees in the Town demo for BIRP can be found in CityBuilderTown/Prefabs/Trees/BIRP.
Feedback
The quickest channels to reach me are mail and discord. Please feel free to reach out with any problems and questions. Feedback regarding the general direction of CCBK and particular future features are also always welcome. Though I might not immediately be able to incorporate your requests I very much take them into consideration when planning out future updates.
If you can spare the time please consider leaving a review in the asset store.
Release Notes
permalink: /manual/releases title: “Release Notes” sidebar: title: “Manual” nav: manual —
1.10.0
minimum recommended unity version has been raised to 6000.0.76
render pipeline of all demo and test projects has been changed to URP
ADDED
- Terminating and Moving events on Building
- Building- and Walker Root transform can be set on DefaultBuildingManager
- WalkerAddons can be added on walker spawn and finish, for example to add effects
example addons from(Walking/Addon) used in three and some demo scenes - Support for new InputSystem(enabled by default, controls in CityInputActions)
CHANGED
- walkers inside building transforms are removed when a building is moved
- NavMeshSurface added to three, defense and test scenes
- town demo terrain trees use regular prefabs instead of obsolete unity Tree
this causes warnings and billboards not working, use speedtree to resolve - town demo felled trees uses StructureCollectionFloat and keep terrain randomization
- reserialized all assets
FIXED
- houses spawning in ground in three terrain demo
- some minor issues in tests
1.9.5
minimum recommended unity version has been raised to 2021.3.45
CHANGED
- reserialized all assets
FIXED
- retriever walker getting stuck on load
- exceptions with missing walker descriptions
1.9.4
IMPROVED
- cooldown on risks and grace period on services
FIXED
- duplicated walkers on reload when using object pool
- homeless walkers going to full houses
- risks assigned to wrong recipient
- emigration walker not loading correctly
1.9.3
ADDED
- town collection test scene
- uvs for three road models
FIXED
- missing event systems in movement playgrounds
1.9.2
ADDED
- Undo/Redo
build, replace and demolish are captured when IUndoRedoStack is present in scene
building state is captured in action and restored when it is re-added
stack is persisted and consistent across save/load
fires event with all affected points used for visualization
see playground scenes, defense, urban, three demos - more visual examples for build, demolish, selection
arise, drop, appear, dissolve, particles (see new tools in BuildingPlayground3D)
scaling animated selection border (see BuildingPlayground3D/Terrain/Expandable) - BuildingPlaygroundZones shows how structures can be used as zones
IMPROVED
- partial expandable rework
ExpandableBuilder behaviour redone, new options for rotation, minsize
new IExpandableVisual interface allows different visual implementations
alternate expandable visual implementation called ExpandableVisualCapped
see new BuildingPlaygroundExpandable test scene - height mapped building grid and overlays
see GridVisual and Overlays in DebugTerrain scene in Three demo - additional particles and animations in urban demo
- ‘Rotate’ option in building addons allows applying rotation from building
CHANGED
- assets in urban demo are new also prefixed with ‘urban’
- id is moved over to new building in replacement
- ui scaling adjusted in some demos
- BuildingAddonTransformer now also transforms position
settings to change if it resets and whether to hide initially
FIXED
- error when renderer was removed while building was highlighted
- navmesh not updating properly on repeat loads in town demo
1.9.1
ADDED
- StructureTerrainTreeVariants manages multiple tree prototypes in one structure
can be tested using the ‘Red’ and ‘Blu’ tools in BuildingPlaygroundTerrain - StructureReplacer tool to replace points in one structure with another
can be tested using the ‘RToB’ and ‘BToR’ tools in BuildingPlaygroundTerrain - WalkerCategory holds collections of walkers for use in scores or road blocking
- WalkerScore returns the active number of walkers of a certain type or category
IMPROVED
- SelectionTool now allows configuring selection methods and filters
select whether selecting buildings and walkers uses raycasts or points selection
also filters and masks to define which buildings and walkers are selectable - DefaultGameManager.StartedDebug for when the game is started with debug mission
- IStructure.ReplacePoints additional parameters keepRandomization and keepVariant
CHANGED
- NavMeshes in Town demo are no longer baked in debug and testing scenes
they are now generated at start like in regular stages - DefaultGameManager now has very early execution order
previously Started event fired after structure initialization
this caused a bug in town demo when the hill stage was started directly
FIXED
- ExpandableVisual did not take CellOffset into account
1.9.0
ADDED
- Terrain variant of Three demo that uses Terrain for its ground
- Hybrid variant of Town demo with regular models instead of terrain trees
- TownPlainsHybrid mission selectable from the Title
- new tree and berry bush models
- About Button in SceneView that shows short description in most scenes
- HeightMapped(Graph) shader and HeightMappedRenderer component
moves vertices according to heightmap, can show tilemaps like roads on top of terrain
used in Three DebugTerrain scene and BuildingPlaygroundTerrainTilemap - StructureCollectionFloat that saves full position instead of just map point
IMPROVED
- Agent walking with (stopping)distance
usable with the new WalkAgentAction, new field in town harvest and item tasks
stops town walkers in front of trees and items instead of inside them - Place structures and buildings by just clicking on the map
click StartPlacing in the inspector of various components to start StructureCollection(Float), StructureDecorators, DefaultBuildingManager - show storage capacity and missing construction items in town building panel
- activate navmesh obstacle in town construction after ground is cleared
- ObjectGenerator places prefabs in Edit mode instead of instances
- apply height to Wanderer, StructureCollection, StructureDecorators
- apply height to NavMesh destinations and agent walking
- TerrainMap visualizes Min- and MaxHeight
- moved sprite and model variants of Three roads into different palettes
- better URP material upgradability
- debugger step through getting dependencies
- better handling of missing mouse position(throws error in unity 6)
CHANGED
- Negative ExecutionOrder for Maps, ObjectSet and Structures
structures can now reliably be retrieved by key in start
map features like grid position can be used in Awake - Addons are always placed in Pivot position, Center field removed
- Building WorldCenter returns Pivot position including height
- DefaultMapHeight set global position instead of localposition
- apply Building height in Start instead of Initialize
- renamed others folder to playgrounds
- renamed remaining vector2int variables from position to point
- added prefix to remaining defense assets
- moved overlay material to core, cleaned up different materials in other projects
- moved town border and light into setup prefab
1.8.8
ADDED
- PathQueries
request simple walking paths as well as receiver, giver and worker paths as a query these queries can be completed later allowing a better distribution of workload - BurstPathfinding
pathfinding method can be switched between regular and job based burst pathfinding this is done on the new pathfinding options on Road and Structure Managers - InitializationMode
new options on spawners of delivery, worker and retriever walkers
allows choosing if a path is calculated before or after spawning
IMPROVED
- Performance
items storage, dependency caching, less linq in hot paths, migration, layer modifier, … - Unity 6 Compatibility
obsolete methods replaced by new variants
CHANGED
- Package Dependencies
dependencies on burst, tilemap, textmeshpro are included explicitly in the package
FIXED
- exception in urban tunnel scene
- migration speed calculation
- monument using item on wrong stage
- wrong tiles assigned in three roads
1.8.7
ADDED
- MoveTool
allows moving and rotating one or more buildings and structures
IsMovable field added to BuildingInfo and different structure components
tool added in sidebar in various scenes, move button added to three building dialog - ConnectionPlayground(CityBuilderCore.Tests/Other)
playground scene that allows trying out Connection system on its own
also check out the new Connections manual page which explains connection fundamentals - ConnectionFeederBuilder
special building builder that shows preview of connection
used in playground and urban demo power station - LayerPlayground(CityBuilderCore.Tests/Other)
playground scene that allows trying out Layer system on its own - LayerBuildingBuilder
special building builder that previews layer values by highlighting or tilemap
used in playground(LayerPreview tilemap) and on three demo gardens(highlighting) - SelectionSwitcher
allows switching through buildings and walkers of the same type from dialogs
using in three and town demos(special variant in town demo that switches by job)
IMPROVED
- HelpUrl
clicking the ? button on an AAK behaviour will now open the API documentation - ConnectionPasserStructure now allows specifying structure by Key
this allows passing connections through roads as shown in the connection playground - ViewLayer now also visualizes points with 0 value if they are affected by something
avoids strange looking gaps in the overlay when layer value adds up to 0 between affectors
CHANGED
- tool cancellation no longer bound to framerate
- selection tool needs full click instead of just mouse up
- DefaultStructureManager subscribes to PointsChanged for every type of structure
- CheckBuildingRequirements renamed to CheckRequirements
and split into CheckBuildingRequirements and CheckRoadRequirements
FIXED
- height calculation for ghosts different from placed buildings
- urban power lines did not refresh connections on destroy
1.8.6
IMPROVED
- default highlight manager can highlight tiles with colors(mouse over highlights)
- meta save data is deleted with the regular save data
- rotating the camera with RMB does not cancel tools(click held longer than 0.1s)
- highlights and layer keys are not shown when mouse is outside map
- building and walker addon queue is now also persisted
- canceling of roaming and walking
cancellation is stored in walking state leaving walking path mostly stateless and reusable walking by method or process and cancelling can be tested in MovementPlaygroundGrid - additional xml documentation in code
FIXED
- copy and deleted buttons in editor dialogs too small in newer unity versions
- bug when saving the game in town demo before placing the initial building
1.8.5
ADDED
- WalkerAddons
reusable piece of logic that can be added to walkers very similarly to BuildingAddons
BuildingAddon has also received some improvements to keep in line with this addition- Save field that sets whether an addon is persisted and recreated on load
- Accumulation field sets what happens when an addon is added more than once
- Walker/BuildingAddonHappening that adds addons when active(epidemic in three)
- Slower building in the defense demo
applies slow addon to attackers which slows them and shows a blue capsule
IMPROVED
- SelectionTool visualizes hovered point, walker or building in town and three demos
highlighting used to visualize points, walkers and buildings by using addons - SelectionDialog and town dialogs visualize selected walkers and buildings
- CameraController can pan, zoom, rotate and pitch on both mouse buttons
MiddleMouseButton: default>pan shift>rotate&pitch alt>zoom
RightMouseButton: default>rotate&pitch shift>zoom alt>pan - ItemStore can be persisted by one of the connected storages
see StorageDebugging for an example of two storages using the same ItemStore - additional test for town demo that tests home provisioning
- switch between walkers and their home in town dialogs
- stacked storages can reserve capacity
- additional custom editors
- trigger timing happenings(epidemic, rain, …)
- town walker editor
- storages show reservations
FIXED
- task cancellation on walker death in town demo
- ItemStorage MoveItemsTo correctly returns the moved quantity
- town demo building dialog error in empty homes
1.8.4
ADDED
- Sounds
Town demo now has UI sounds, an atmospheric background track and various sounds for tasks like harvesting stone or chopping wood- AudioPool to play sounds like button clicks from a central component
- AudioSlider that sets and persists volume levels
- MissionSelector
example scene that demonstrates an alternate setup for a menu screen(CityBuilderCore.Tests/Other/MissionSelector) - TaskList
used in the Three demo for a multi stage tutorial - MessageBox
generic message box dialog(Ok, OkCancel, YesNo, YesNoCancel) - Messaging
allows sending messages and attaching events to buildings and walkers
Town uses this to send messages from animations to the current task where it plays a sound
CHANGED
- DefaultMap no longer clamps points, clamping is done in CameraController instead
FIXED
- tooltips sometimes not exiting
1.8.3
IMPROVED
- continue game from last saved data
new buttons using this functionality in Three and Town demos - whether a stage is finished is saved per stage and per save game
this allows beating the stage again on a new save
FIXED
- walkers using navmesh agents cancelling on load
- exception in storage component with older data
1.8.2
IMPROVED
- ItemStorage has new ItemStorageMode called Store
allows redirecting to a seperate ItemStore component
for example to combine storages across a building - TerrainMap now derives from DefaultMap
this enables blocking through tilemaps on TerrainMap - various custom property drawers
ItemQuantity, ItemStorage, BuildingRequirement, … - storage orders are now also persisted
FIXED
- GetItemQuantity on MultiItemContainer leading to wrong display in UI Panel
- service category recipient not triggering evolution
1.8.1
ADDED
- additional debug options in the inspector in play mode
for example items can be added directly to StorageComponents
available for Building and various BuildingComponents
FIXED
- DeliveryWalker looking for storages in Load before storages are full loaded
- GridPathing allowed invalid paths by default, now behind const ALLOW_INVALID
- ServiceCategory was not fully integrated in Evolution
- Invalid tool selection in new game in TownDemo after placing startup
- TMPro warning in TownDemo due to unnecessary CanvasRenderer
- Validation that prevents global storage from being configured to access itself
1.8.0
minimum recommended unity version has been raised to 2021.3.29
ADDED
- minimal demo scene demonstrating simple placement
CityBuilderCore.Tests/Other/Placement/Placement.unity - Buildings can now be suspended and resumed
temporarily stops them from working without having to demolish and rebuild them
(see checkmarks Three and Town demos building dialogs) - simple SavingIndicator in all demos
- simple spawn(BuildingAddonSpawn) and despawn(DemolishVisualDespawn) animations
(see Placement demo)
IMPROVED
- Migrations can be configured to use multiple entry points
(see PlebMigration in Three demo Debug scene) - Box option in StructureBuilder to build in a rectangular shape
(see RugTool in Placement demo) - Override option in StructureBuilder to remove other structures
(see RugTool in Placement demo) - Demolish tool has new LevelsNext field to configure order of deletion (see DemolishTool in Placement demo)
FIXED
- tooltip position in scaled canvas
- various minor adjustments to accommodate higher unity version
1.7.4
this will be the last version based on unity 2019.4.18, the next update will increase the minimum version to a more recent LTS
ADDED
- tagged requirements on DefaultMap and TerrainMap
define certain building restrictions on the map by tag(building, road, structure)
check out BuildingPlaygroundTagged and BuildingPlaygroundTerrain for some examples
IMPROVED
- StructureBuilder can now be used for any structure
FIXED
- removal of old roads on load
- harvesting of grown trees in town demo
- gaps in terrain road visuals in some maps
1.7.3
ADDED
- Off Grid Link
equivalent to OffMeshLink in NavMesh but for grid(road) walking
see debug scenes LinkRoadDebugging and BuildingPlaygroundLink - Mesh Highlight Manager
visualizes highlights by modifying meshes during runtime
used in town demo to dramatically improve highlighting performance
three demo uses mesh highlighting with nice rounded outlines
see BuildingPlayground2D for simple pixelated outline - Variant Production Component
more versatile production component that allows configuring different variants
see ProductionDebugging test scene for some examples
IMPROVED
- better handling of mouse position outside play area
- town demo harvest tool performance dramatically improved
1.7.2
ADDED
- Tooltips
- Walker and Building Dialogs in Town Demo
- Notifications in Three Demo(Risks, Monuments)
CHANGED
- Building Alternative is rotated on build
FIXED
- Error in Editor Windows with Unity 2021
- TownConstruction finishing prematurely
- Error caused by Harvest Tasks being restarted
- Off Mesh Link on Bridges in Three Demo
1.7.1
ADDED
- Notification System and Notifications for
- Town Constructions finishing
- Town Season changing
- Town Walkers dying
- Urban Tornados
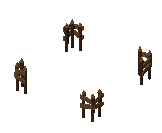
- Town Trees falling down is now visualized
- Town Walkers can visualize Tools for Tasks
- Woodcutters and Foresters use an Axe
FIXED
- critical bug preventing loading of most walkers
- bridges not working as roads after reloading
- worker walkers bug when site loads later or is destroyed
- dead town inhabitants not being removed from their home
- some other minor fixes in the town demo
1.7.0
3D Colony Sim Demo
This release marks the official promotion of CityBuilderTown from experimental to an official demo. This means a removal of all placeholders and a rework of all elements of the demo. This includes a completely new Set of Low Poly 3D Models used in that demo.
1.6.1
ADDED
- ZoomCollider on CameraController can keep camera from clipping
(used in town demo and three demo stage two)
FIXED
- TerrainModifier not replacing TerrainData in collider
(caused bad highlighting in generated town demo scenes)
1.6.0
ADDED
- TerrainRoadManager visualizes roads by changing terrain texture
- Terrain option in Setup Dialog
- MovementPlayground and BuildingPlayground test scenes
- DepopulationHappening which kills a fraction of the population
- TownDemo
- title screen, menus, difficulty, map generation
- market building, distribution task, peddler job
- road tool and task
- views for food, wood and actions
- test project
- inspector tooltips, xml documentation
- …
IMPROVED
- TerrainModifier can also save height and texture
- GridHeight is applied to Buildings
- Walker can use NavMeshAgent for movement
- BuildingBuilder adjusts position based on camera direction
- CameraController now saves rotation
FIXED
- LayerKeyVisualizer on scaled canvas
- HasPoint on NavMesh when elevated
1.5.1
ADDED
- PopulationVisualizer that displays population quantity and capacity
- ManualExpansion allows placement of ExpandableBuilding in Editor
CHANGED
- DistributionComponent
no longer discards items the seller brings back if the storage has been filled
additional new option on SaleWalker to reserve space for the items it carries - TownHomeComponent spawns walkers even when empty
FIXED
- ProductionWalkerComponent missing calls to base methods
- StructureTerrainTrees not changing on load
- TownDeliveryTask not finishing when items are brought directly
- TownGatheringComponent and TownForestingComponent task cleanup and saving
- TownFieldTask was missing walker assignment
1.5.0
first in a series of 2-3 updates that focus on the new CityBuilderTown demo, documentation and core framework improvements
ADDED
- CityBuilderTown[EXPERIMENTAL]
- terrain based
- task system
- Walker Actions and Processes
- higher level walker control
- Risk- and ServiceCategory
- building and walker bars
- service category evolution
- Building Prefab Alternatives
- ItemConstructionComponent
- replaces building when items have been supplied
IMPROVED
- Documentation
- header comments for all core objects
- descriptions for demo manual pages
- core building components manual diagram
- Walker now directly exposes an Animator
- animation parameters on WalkerInfo(Walk, Direction, Carry)
- additional storage modes(ItemSpecific, TotalItemCapped, TotalUnitCapped)
- various interfaces simplified
FIXED
- mouse wrongly touch panning
- camera shake on middle mouse drag
1.4.6
ADDED
- Mobile support for Urban and Defense Demos
- adjusted UI
- added touch controls
- WalkerAreaMask (NavMesh areas for use in PathTag)
1.4.5
ADDED
- More uses for PathTag (see Walkers manual page)
- RoadBlockers in Three Demo can be set to let certain Walkers pass
- Different Pathing by Ground Tile in StructurePathDebugging test scene
IMPROVED
- URP upgradability for Three demo (see CityBuilderThree/URP)
- Employment Priorities are displayed in descending order
FIXED
- Service Values increasing over time instead of decreasing
- walker rotation in urban tunnel scene
- three props now use the correct materials
- links in manual pdf
1.4.0
ADDED
- Food View in Three Demo
uses the overhauled views and bars and the new IItemHolder interface
walkers can now also have bars; added bars that show items using their icons - Tornado Happening in Urban Demo
IMPROVED
- Health Bars in Defense Demo reintegrated with Core Views and Bars
- Rain in Three Demo now affects Heat and Water
the new ILayerModifier interface can be used to globaly affect Layers - Religion in Historic Demo now affects Farming Efficiency
the new ScoreEfficiencyComponent uses a Score to affect Building efficiency - Migration in Three Demo is now driven by a Score
this happiness score combines employment, housing quality and food availability
FIXED
- suppressed unused event warnings
- recursive error in retrievers
- missing sprites in urban demo
- minor errors in tests
1.3.0
ADDED
- Timings system (events, animations and text based on playtime)
- Hexagon support in Setup, Map, Tiles, …
- Decorator Structures that save rotations and sizes
- Object Generator for easy map object generation
IMPROVED
- FireWalker in Three Demo now actively walks to and extinguishes fires
- Walkers use better points to enter and exit buildings(Pathfinding accepts multiple starts/ends)
- BuildingRequirement can now require Buildings(see BuildingRequirementDebugging)
- DefaultGameManager now saves the current randomization state
FIXED
- AccessType Exclusive
- Rotations in XY Maps
1.2.0
ADDED
- Overview Windows for Buildings, Walkers and Items
these display all the objects in a set with preview images
objects can be filtered, cloned and deleted
IMPROVED
- Complete visual overhaul of 3D City Builder Demo
- 25 Original Low Poly Buildings
- Humanoid Walkers with Animations
- Maps, Props, Materials, Effects, …
- Updated “Start from Scratch” Tutorial
- Incorporates new Setup and Overview Windows
- New sprites for Buildings and Walkers
CHANGED
- Common walker properties have been moved to WalkerInfo
PathTyp, PathTag, Speed, MaxWait, Delay
FIXED
- Expandable buildings not loading their expansion
- Buildings having wrong scale after being affected by BuildingAddonTransformer
this lead to buildings in the three demo always being slightly off scale or very off scale when the framerate was low - Roads for Bridge being amended without rotation
- Path Recalculation for moving walkers in Defense Demo
- Roads being demolished when their RoadBlocker was demolished
Roads are “underlying” and therefore only demolished when no non “underlying” structure is demolished at the same time - Pooled walkers retaining their items and state
- …
1.1.0
ADDED
- Setup Wizard window
creates a clean project template with placeable buildings
configure display modes, axis, sizes, … in a simple dialog - Expandable Buildings
building size is determined during building
expand building in one or two dimensions
showcased in the new bridge building of THREE demo - enhanced Full 3D support
showcased in new 3D demo scene in THREE demo
support for perspective camera and 3D roads
height parameter in walkers can modify their display
(move along terrain or change to different layer in tunnel) - Road Switching
allows destination walkers to move between road networks
showcased in SwitchRoadDebugging scene in tests and tunnel scene in urban demo
IMPROVED
- Building Requirements now support various modes and configurations
- Road Requirements can now be configured to amend missing roads
- Cell Size of grid is taken into account in default and isometric map
CHANGED
- RoadBuilding functionality has been merged into regular Buildings
FIXED
- incorrect camera area when camera was pitched enough to look up
- structure level editor not working inside arrays
- monument pathing when using worker pooling
- …
1.0.0
ADDED
- urban demo project
simple city sim in isometric 2d
showcases various 1.0 features - connections core system
build a network of feeders and passers
enables water and electricity networks - connected tiles that switch sprite based on their neighbors
simple base class and variants for rectangle and isometric grids
IMPROVED
- walkers can now be pooled using ObjectPool
- roads now support multiple networks
simply use MultiRoadManager instead of DefaultRoadManagerrails and roads in urban demo
- structures now support multiple levels
easily control which levels a structure inhabits using the level togglesa single point in the urban demo can have a pipe, road and power line; pumps inhabit all three levels
- new view type that displays building efficiency
CHANGED
- demo materials have been switched from urp to legacy shaders
- sort axis moved to camera controller
FIXED
- blockers not working after save/load
- building walkers not triggering on spawn
- panning in xy isometric maps
- speed controls in historic demo
- …
0.9.0
Initial Release
3D City Builder
permalink: /manual/three title: “3D City Builder” sidebar: title: “Manual” nav: manual —
Play it here, uses pretty much every system in CCBK except attacks.
While the visuals are now fully 3D this demo still uses Tilemaps for its logic. This means the 2D Tilemap Editor is still required. For example the type of ground is still determined by the ground Tilemap, it is just invisible because its renderer has been disabled. So to block building or set layer values based on ground you need to enable the renderer, draw your changes and then disable it again.
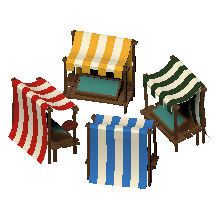
Buildings
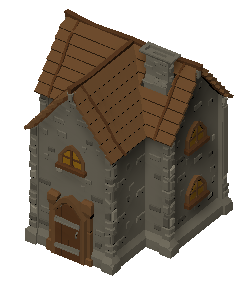
Housing
 |
Property | HousingPlaceholderComponent | Prefab: Tent |
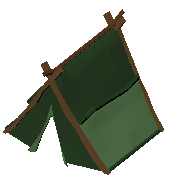 |
Tent | HousingComponent EvolutionComponent RiskerComponent |
Capacity: 5 Plebs Evolution: Housing Collapse: 1/s Disease: 3/s |
 |
Hut | HousingComponent EvolutionComponent RiskerComponent |
Capacity: 10 Plebs Evolution: Housing Collapse: 3/s |
 |
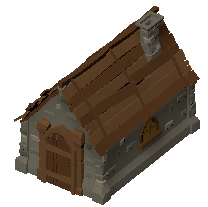
House | HousingComponent EvolutionComponent RiskerComponent |
Capacity: 15 Plebs Evolution: Housing Collapse: 3/s |
 |
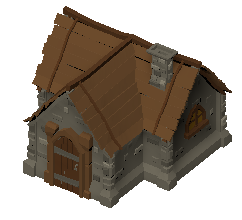
Villa | HousingComponent EvolutionComponent RiskerComponent GenerationComponent |
Capacity: 15 Plebs Evolution: Housing Collapse: 3/s Interval: 10 Items: 20 Gold |
Housing is built using the BuildingBuilder in IngameUI/Tools/HouseTool. Which building a BuildingBuilder builds is determined by the BuildingInfo field. In this case that is PropertyInfo so a Property building will be placed by the tool.
The Property building has a HousingPlaceholderComponent that just waits to be occupied and then replaces the building the lowest tier of actual housing(Tent). The occupation happens when an ImmigrationWalker arrives at the building. These ImmigrationWalkers are spawned by the Migration behaviour in PlebMigration as long as the sentiment is good enough. The sentiment in THREE is calculated in the MigrationScore which is a combination of housing quality, food safety and employment.
Tents and all the other, higher types of housing have a HousingComponent which determines how many people of a population type each of them has capacity for. These population quantities can then be used in buildings that need employment to work. In THREE there is only one Population type called Plebs.
The housings also have an EvolutionComponent that refers to the HousingEvolution EvolutionSequence. This EvolutionSequence specifies what any of its stages needs to evolve to the next one. To evolve to a Hut the Tent needs access to the WaterService and the DesirabilityLayer needs to have a value of at least 5 in the location of the Tent. So we need to place a Well that can reach the Tent and a Garden close to it to make it evolve.
The third building component all housings have in common is the RiskerComponent which defines which Risks can proc on a building and how fast the risk value increases. The Tent has a CollapseRisk which makes terminates the building and replaces it with rubble and a DiseaseRisk which places an addon on the building that sends out DiseaseWalkers that infect other houses and eventually kills its occupants.
Only the highest tier housing(Villa) has a GeneratorComponent which generates Gold at certain intervals that can be collected by Treasurers.
Risks&Services
 |
Well | EmploymentComponent ServiceWalkerComponent |
Group: Services Needed: 5 Plebs Downtime: 5 Prefab: WaterWalker |
 |
Workshop | EmploymentComponent RiskWalkerComponent |
Group: Services Needed: 5 Plebs Downtime: 5 Prefab: CollapseWalker |
 |
Firefighter | EmploymentComponent RiskWalkerComponent |
Group: Services Needed: 5 Plebs Downtime: 5 Prefab: FireWalker |
 |
Doctor | EmploymentComponent RiskWalkerComponent |
Group: Services Needed: 5 Plebs Downtime: 5 Prefab: DiseaseWalker |
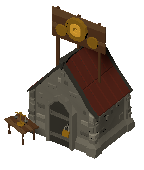 |
Treasurer | EmploymentComponent CollectionComponent |
Group: Services Needed: 5 Plebs Downtime: 5 Prefab: TreasureWalker Storage: Global |
These Buildings all have an EmploymentComponent which specifies how many Plebs are needed for the Building to fully function. Unless they are fully staffed they wont send out walkers that perform their various functions.
The Well sends out a Walker that provides the WaterService that is needed for housing higher than Tents. The Workshop, Firefighter and Doctor send out walkers that prevent different Risks from happening in buildings they pass. The Treasurer sends out a walker that collects the Gold that is generated in Villas.
Food
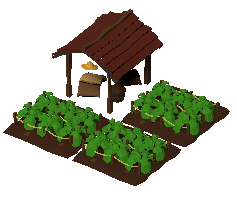 |
Farm | EmploymentComponent ProductionComponent LayerEfficiencyComponent |
Group: Food Needed: 15 Plebs Interval: 10 Produces: 100 Potatoes Layer: Water Min: 0.2 Max: 100 |
 |
Hunter | EmploymentComponent ItemsRetrieverComponent |
Group: Food Needed: 10 Plebs Retriever: HunterWalker Downtime: 10 |
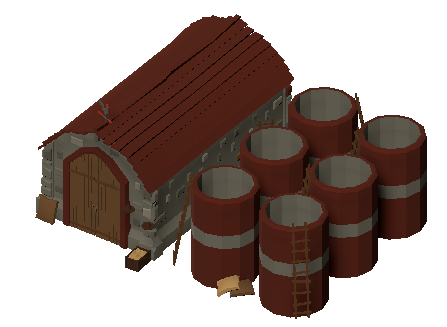 |
Silo | EmploymentComponent StorageComponent |
Group: Logistics Needed: 10 Plebs Storage: Stacked StackCount: 6 Capacity: 4 Orders: Accept Potato, Meat |
 |
Market | EmploymentComponent DistributionComponent |
Group: Services Needed: 10 Plebs Storage: Unit Capped Capacity: 5 MinimumOrder: 1 Orders: Fill Potato, Meat |
To evolve from Huts to Houses the housings need one type of food, to get to the Villa level two different types are needed.
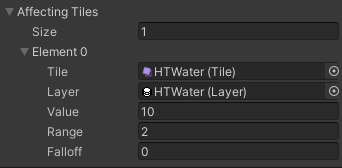
Farms have a ProductionComponent that generate potatoes at a certain interval which is influenced by the buildings efficiency. The EmploymentComponent lowers building efficiency when the building is not fully staffed. The LayerEfficiencyComponent influences building efficiency based on the value of the WaterLayer at the position of the building. This means Farms work better when they are closer to Water(because of the AffectingTile in the DefaultLayerManager in Logic) and when it rains(RainWater LayerModificationHappening).
Hunters have a ItemsRetrieverComponent that sends out HunterWalkers that look for BLB dispensers. These dispensers are wanderers that get created by the TilemapSpawner of Grid/Ground and destroyed when the SingleItemsDispenser on the is used by a hunter.
Both Farms and Hunters have DeliveryWalkers that try to deliver their produced food to the closest Silo(IItemReceiver). If they don’t find one that has space for their items they just just stand around and retry until they eventually vanish.
To get food from Silos to housing a Market is needed. It sends out SaleWalkers that check what the housings they pass need. PurchaseWalkers then try to find the needed items at the closest Silo(IItemGiver) and take it back to the market. SaleWalkers then fill up on these Items before they next head out, they will then give those Items to any housing they pass that needs them(IItemRecipient).
Notice the different walkers we have used in this category. The HunterWalker walks around the map which is specified by setting Map as its PathType in the HunterWalkerInfo. SaleWalkers are roaming walkers(RoamingWalker>BuildingComponentWalker>SaleWalker) that use PathType RoadBlocked so they have to use the road and can be blocked. PurchaseWalkers are destination walkers that use the Road PathType so the also use the road network but can walk over generic road blockers.
Production
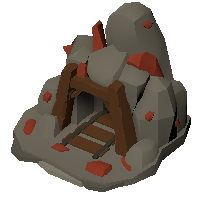 |
Iron Mine | EmploymentComponent ProductionComponent |
Group: Production Needed: 10 Plebs Interval: 20 Produces: 1 Iron |
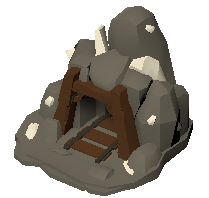 |
Granite Mine | EmploymentComponent ProductionComponent |
Group: Production Needed: 10 Plebs Interval: 20 Produces: 1 Granite |
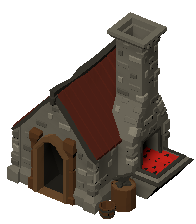 |
Smith | EmploymentComponent ProductionComponent RiskerComponent |
Group: Production Needed: 10 Plebs Interval: 10 Consumes: 1 Iron Produces: 10 Tools FireRisk 3/s |
 |
Yard | EmploymentComponent StorageComponent |
Group: Logistics Needed: 10 Plebs Storage: Stacked StackCount: 8 Capacity: 4 Orders: Accept Iron, Tools, Granite Refuse Potato, Meat |
The production buildings in THREE produce goods that are eventually needed to build the Obelisk monument. The GraniteMine produces Granite items which are directly needed in the building process of the Obelisks. The IronMine produces Iron which has to be refined by a Smith to Tools which are needed for Labour workers to spawn. The Smith also has a RiskerComponent with FireRisk so it needs a Firefighter nearby or it will go up in flames.
The items a StorageComponent can store are defined in the Orders field. For example the Silo does not have any order for Iron so it will never store it. The StorageYard on the other hand has an order for every item but the orders for Food have a ratio of 0. This ratio can be changed by the player so yards can theoretically also be used to store food.
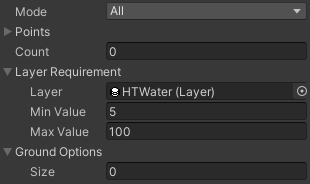
The mines both have building requirements that specify where on the map they can be built. The GraniteMineInfo has a building requirement with Mode All that has the Granite tile as a ground option. This means that every point of the Granite Mine has to be built on a Granite tile. The IronMine specifies Any with count 1 and a layer requirement for the IronLayer between 5 and 999. Therefore at least one point of the IronMine has to be built on a point with an IronLayer value of at least 5.
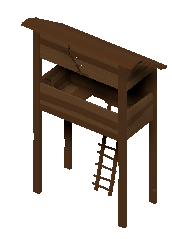
Workers
 |
Labour Camp | CyclicWorkerProviderComponent ItemEfficiencyComponent |
Prefab: LabourWalker Downtime: 5 Item: Tools Interval: 10 |
 |
Mason Camp | PooledWorkerProvider | Prefab: MasonWalker Count: 2 Downtime: 3 |
 |
Entertainer Camp | CyclicWorkerProviderComponent RiskerComponent LayerAffector |
Prefab: EntertainerWalker Risk: Fire Increase: 5/s Layer: Desirability Value: -10 Range: 3 Falloff: -3 |
These buildings all spawn worker walkers that can be used in IWorkerUsers, which workplace can use which worker is defined by the Worker object that is set in WorkerWalker.Worker. There is a small difference between the spawners in Labour- and EntertainerCamp and the one used in the MasonCamp. CyclicWorkerProviders send out ‘fire and forget’ walkers in fixed intervals(influenced by efficiency) while the PooledWorkerProvider has a certain number of walkers that return to the building and go back out after a cooldown.
Other
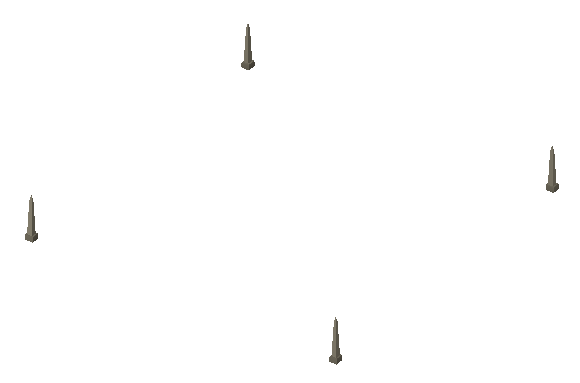 |
Obelisks Site | MonumentSiteComponent | Stages: CirclyPits, CenterPit, CircleObelisk, CenterObelisk various steps with different workers per stage |
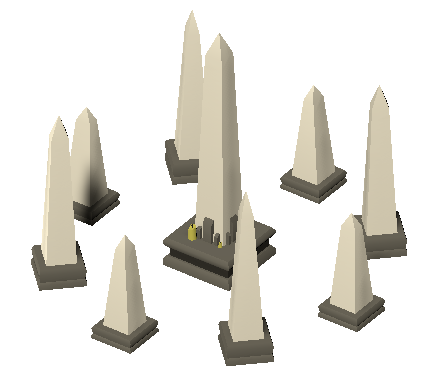 |
Obelisks | ||
 |
Stage | WorkerUserComponent LayerAffectorWorking |
Worker: Entertainer Quantity: 1 Queue: 2 Duration: 20 Layer: Entertainment Value: 100 Range: 10 |
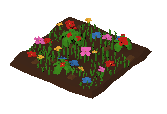 |
Garden | LayerAffector | Layer: Desirability Value: 10 Range: 3 Falloff: 3 |
 |
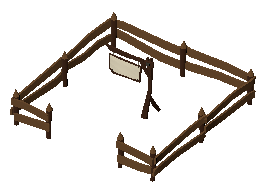
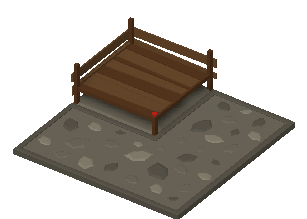
Road Blocker | RoadBlockerComponent | Separate Tags for every roaming walker |
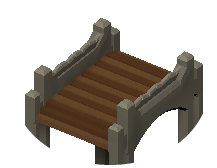 |
Bridge |
An ObeliskSite has a MonumentSiteComponent which defines all the different stages of building, these different stages and their steps define which workers and items are needed and where. When one stage is completed the monument site progresses to the next one until finally it is replaced by the finished Obelisks building.
The Obelisks building does not have any function of its own. It is just used in the MonumentScore for 100 points. In Mission3 having a MonumentScore of 100 is set as the win condition so as soon as the Obelisks are built that mission is won.
Stages are WorkerUserComponents that use the Entertainer worker type. Each worker that arrives at a stage keeps if functional for a while. The stage also has a LayerAffectorWorking which increases the EntertainmentLayer value around it as long as the building is working. That entertainment value is needed to evolve Houses to Villas.
Gardens are simple buildings that just increase the desirability layer values around them, this is needed to evolve housing from Tents to Houses.
A RoadBlockerComponent can be used to block walker from using the points on a road under it. The one in THREE has different WalkerInfos set in its Tags which results in only those walkers being blocked. In addition when the RoadBlocker is clicked by a player it is possible which of the tags is actually active in the dialog.
Bridges are special buildings that let walkers pass over them. They let walkers with PathType Road pass be registering the points they occupy as a road using the StructureRoadRegisterer and they let map walkers pass by having a OffMeshLink that is used be the NavMesh. They are special because they can have different sizes, to do this their BuildingInfo is a ExpandableBuildingInfo, their Building is an ExpandableBuilding and they are built using an ExpandableBuilder. Another special feature bridges have is the height override on Bridge/Pivot/Height which forces any walker that collides with its box collider to a certain height.
Structures
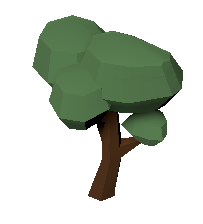 |
Tree | StructureCollection LayerAffector |
Key: TRE Destr: 1 Deco: 0 Walk: 0 Size: 1 Layer: Desirability Value: 5 Range: 2 Falloff: 2 |
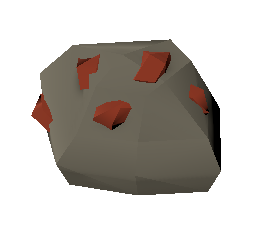 |
Ore | StructureCollection LayerAffector |
Key: ORE Destr: 0 Deco: 0 Walk: 0 Size: 2 Layer: Iron Value: 10 Range: 1 |
 |
Rubble | StructureCollection | Key: RUB Destr: 1 Deco: 1 Walk: 0 Size: 1 |
The Tree Structure found under MapObjects/Trees is a simple StructureCollection with size 1. Its Key is TRE which can be used by others objects in the game to refer to the structure without directly referencing it. A LayerAffector that affects the desirability layer can be found on the same gameobject. A LayerAffector looks for a structure on the same or the parent gameobject and affects the layer ad every point of the structure. It subscribes to the structures changed event so whenever a tree is removed the desirability is changed accordingly.
Ore works pretty much exactly like Trees. The only differences are that IsDestructible is not checked for Ore so it cannot be removed by the DemolishTool. Also the LayerAffector affects the IronLayer which is used to check where IronMines can be built.
The Rubble StructureCollection is marked by IsDecorator as a decorator which means that it will not keep buildings from being built on top of it and will automatically be removed when they are. Rubble is created when a building is destroyed by the CollapseRisk because that Risk has RUB set as its StructureCollectionKey.
The last two structures found in MapObjects are Bushes and Pebbles which are just there for looks. The only reason they are structures and not just meshes on the map is so they can be removed by the DemolishTool or when something is built on top of them. You will also find an ObjectGenerator behaviour on these decorators which can be used to quickly add a bunch or random decorators in the editor.
Walkers
Migration
| ImmigrationWalker | ImmigrationWalker | Path: Map Capacity: 5 |
| EmigrationWalker | EmigrationWalker | Path: Map Capacity: 5 |
| HomelessWalker | HomelessWalker | Path: Road Capacity: 1 |
Roaming
| WaterWalker | ServiceWalker | Path: RoadBlocked Service: Water Amount: 100/s |
| CollapseWalker | RiskWalker | Path: RoadBlocked Risk: Collapse Amount: 100/s |
| DiseaseWalker | RiskWalker | Path: RoadBlocked Risk: Disease Amount: 100/s |
| SickWalker | RiskWalker | Path: Road Risk: Disease Amount: -10/s |
| FireWalker | RiskWalker | Path: RoadBlocked Risk: Fire Amount: 100/s |
| TreasureWalker | CollectionWalker | Path: RoadBlocked Items: Gold |
| SaleWalker | SaleWalker | Path: RoadBlocked Storage: 1 Unit |
| EmploymentWalker | EmploymentWalker | Path: RoadBlocked Return: 1 |
Logistics
| DeliveryWalker | DeliveryWalker | Path: Road Storage: 1 Unit Return: 1 |
| StorageWalker | StorageWalker | Path: Road Storage: 1 Unit Return: 1 |
| PurchaseWalker | PurchaseWalker | Path: Road Storage: 2 Unit |
Workers
| LabourWalker | WorkerWalker | Path: Road Worker: Laborer Storage: 1 Unit |
| MasonWalker | WorkerWalker | Path: Road Worker: Mason Storage: 1 Unit |
| EntertainerWalker | WorkerWalker | Path: Road Worker: Entertainer Storage: 1 Unit |
Items
 |
Gold | Key: GLD Unit Size: 1 |
 |
Potato | Key: PTT Unit Size: 100 |
 |
Meat | Key: MEA Unit Size: 100 |
 |
Iron | Key: IRN Unit Size: 1 |
 |
Tools | Key: TOL Unit Size: 10 |
 |
Granite | Key: GRT Unit Size: 1 |
2D Tower Defense
permalink: /manual/defense title: “2D Tower Defense” sidebar: title: “Manual” nav: manual —
Art assets have been adapted from packs made by Kenney
Play it here, primarily uses the attacks and items retriever resource systems.
Buildings
 |
Center | AttackableComponent | Health: 100 |
 |
Tower | DefenderComponent | Distance: 2 Cooldown: 1.5 Damage: 2 |
 |
Lumberjack | ItemsRetrieverComponent | Storage: Global Walker: LumberjackWalker |
 |
Stone Quarry | ItemsRetrieverComponent | Storage: Global Walker: StoneQuarryWalker |
The Center building in the defense demo just has an AttackableComponent with a certain health. Since the AttackableComponent implements and registers the IAttackable trait it will be the be targeted by attackers. IAttackable is also used to check if the game is over. Whenever a building is removed the DefenseManager checks if there are any IAttackables left and if not it will end the game.
Towers use the DefenderComponent which periodically queries the IAttackManager for attackers in its range. If one is found the DefenderComponent will hurt it for its Damage and show a line between them for 0.1s.
The Lumberjack and StoneQuarry buildings periodically send out ItemsRetrieverWalkers that look for dispensers with different keys(TRE/STO). Theses buildings use storage mode Global which means that the items brought back by the walkers are stored in one shared ItemStorage instead of the building itself. That global storage is then used by the BuildingBuilders in IngameUI/Tools when building and by the InventoryVisualizers in IngameUI/Wood/Text and IngameUI/Stone/Text.
Structures
 |
Walls | StructureTiles | Key: STO Replicates to WallObstacles |
 |
Trees | StructureCollection Tree > ReloadingItemsDispenser |
Key: TRE Prefab: Tree Key: TRE Charges: 1 Reload: 5 |
 |
Rocks | StructureCollection Rock > ReloadingItemsDispenser |
Key: ROK Prefab: Rock Key: STO Charges: 1 Reload: 5 |
Walls are StructureTiles found in Grid/Walls. When the game starts a StructureTiles structure checks for all the points in the tilemap that have the tile they use. Whenever a point is added or removed from the structure it also changes the tilemap accordingly. Walls also replicate to another structure so any point added to it will also be added to WallObstacles. WallObstacles place gameobjects on the map that have a NavMeshObstacle. That is no longer really necessary because nothing in the defense demo currently uses Map pathing but is left in just as a demonstration.
Trees and Rocks are simple StructureCollections that have a gameobject at every one of their points. These gameobjects(Tree/Rock) contain a ReloadingItemsDispenser that can be used by the walkers sent out by the Lumberjack and StoneQuarry walkers. When they are used they return the items that have been set in the Items field. They also wait out the specified ReloadTime before they can be used again.
Walkers
 |
AttackWalker | AttackWalker | Path: MapGrid Speed: 3 Health: 10 Damage: 5 Rate: 5 |
 |
LumberjackWalker | ItemsRetrieverWalker | Path: Map Speed: 2 Distance: 10 DispenserKey: TRE |
 |
StoneQuarryWalker | ItemsRetrieverWalker | Path: Map Speed: 2 Distance: 10 DispenserKey: STO |
Items
|
Stone |
|
Wood |
2D City Sim
permalink: /manual/urban title: “2D City Sim” sidebar: title: “Manual” nav: manual —
Art assets have been adapted from sprites made by opengameart user pixel32
Play it here.
Demonstrated Connections, Multi-Road-Networks and Multi-Level-Structures. Which level each of the structures occupies is shown in the last column(Underground-Road-Building » XXX, OXX, …). The other building components and walkers in this demo are mostly custom made for the urban demo and not part of the core components.
Buildings
 |
Railstation | RailwayComponent | Goods | OXX |
 |
House | ConnectionPasserComponent LayerEfficiencyComponent HouseComponent |
Power Water Van |
OXX |
 |
Shop | ConnectionPasserComponent LayerEfficiencyComponent ShopComponent |
Power Water Money |
OXX |
 |
Water Pump | ConnectionPasserComponent ConnectionFeederComponent LayerEfficiencyComponent |
Power Water Water |
XXX |
 |
Power Station | ConnectionFeederComponent | Power | OXX |
The Railstation building manages train and truck walkers. It periodically spawns a train walker. When a train arrives it spawns a truck.
Houses have two components that influence their efficiency. The ConnectionPasserComponent needs an UrbanPowerSupply to pass through it and the LayerEfficiencyComponent checks the UrbanWater Layer. The resulting efficiency influences both the TimedReplacementComponent which upgrades a house after a set time and the HouseComponent which sends out UrbanVan walkers which purchase goods from any shops they pass. The sprite a house uses is randomly chosen and persisted by the SpriteRandomizerComponent, it even passes the chosen sprite along to the next house when it upgrades.
Shop also need Power and Water to work just like houses. When they are passed by a vans that are sent out by houses the van receives some of the goods in the shop. This makes space for new goods that are delivered by the trucks that the Railstation sends out. When shops replenish their stock from trucks a certain amount of money is also generated and added to the global storage that is used to build new buildings and infrastructure.
The WaterPump needs power and water too. When it has these it feeds into the UrbanWaterSupply Connection which is passed on in pipes. Unlike the other buildings it also occupies the lowest structure level which can be controlled in the Level field of the UrbanWaterPump BuildingInfo. It also has a gameobject called pipe that lies on the Water Layer and will therefore only be visible when a view that show that layer(UrbanWaterCulling) is active.
One behaviour all the buildings that connect to the power grid have in common is the StructureTileRefresher. This script simply refreshes all the nearby tiles of the powergrid so the correct tile that connects to the building is chosen.
Lastly there is the PowerStation building which simply feeds into the UrbanPowerSupply Connection that is passed on by power lines.
Structures
 |
Power Lines | StructureTiles ConnectionPasser |
POW Power |
OOX |
 |
Pipes | StructureTiles ConnectionPasser |
PIP Water |
XOO |
PowerLines pass on the UrbanPowerSupply Connection. They only occupy the upper structure level in which makes it possible to build them on top of roads which only occupy the middle one.
Pipes pass the UrbanWaterSupplyConnection, if you check the Connection in the assets you can also find that it influences the UrbanWater Layer for a range of 5 and with a falloff of 1.
As you can see in the respective gameobjects(Grid/Water, Grid/Power) both of these structures combine a StructureTiles behaviour with a ConnectionPasserStructure which takes the points of the structure and adds it into the connection system. They also have a ConnectionTileGradient that visualizes the amount of connection at every point of the structure by tinting the tile with a gradient.
Walkers
 |
Train | TrainWalker | Rail |
 |
Train | TruckWalker | Road 100 Goods |
 |
Train | VanWalker | Road 5 Goods |
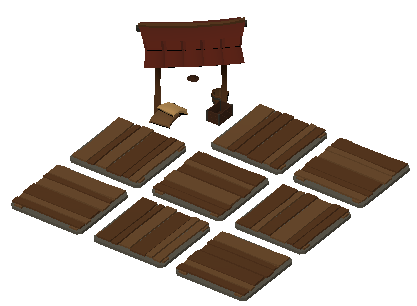
3D Colony Sim
permalink: /manual/town title: “3D Colony Sim” sidebar: title: “Manual” nav: manual —
Open TownTitle to try the game out the same way a player would(TownTitle and TownHills have to be added to Build). To quickly jump in you can use TownDebug or TownDebugFilled which has a bit more stuff set up. The debug scenes also have a debug tool bar above the normal one that lets you build and demolish things instantly.
If you are interested in some of the individual systems of the town demo you can also check out the CityBuilderTown.Tests project which contains various test scenes. Some of them can also be quickly run through with the test runner to confirm that the systems still work after modifications.
Buildings
- House lets occupants eat and warm up and produces new walkers
- Barn stored food
- Gatherer creates tasks for gathering berries
- Farm creates tasks for working fields
- Forester creates tasks for planting and cutting down trees
- Woodcutter creates tasks for turning logs into wood needed to warm up
- Market distributes wood and food to houses that are connected via roads
Tools
- Harvest creates harvest tasks for trees, rocks and berries
- Demolish removes tasks, creates demolish tasks for buildings
Jobs
Jobs can be assigned to walkers from the UI on the bottom left. Tasks without a job, like clearing the ground or picking up items, can be done by any walker. Those with an assigned job will look for tasks that correlate to their job first though.
- Builder builds buildings when the ground has been cleared and needed logs and rocks have been delivered
- Gatherer gathers berries
- Farmer works farm fields
- Forester cuts and plants trees
- Woodcutter turns logs into wood
- Peddler delivers items to the market and distributes them along roads
Tasks
The Task system is the central defining feature of the Town demo. There is only one walker type which has a couple built in processes like getting food or idling. Every other action the walkers take is wrapped in a task that is located on a gameobject somewhere in the world. When they are not occupied by any of their needs walkers query the TownManager for an appropriate task.
To create a new task with your own logic you can create a new script that derives from TownTask. A fairly simple task to check out before jumping into your own would be the TownItemTask. Some tasks may have state that needs to be persisted, for an example of that check out TownBuildTask.
Tasks as well as the walkers heavily rely on the new walker actions and processes. To learn more about them check out the manual section and the xml documentation in their code.
| Build | progresses the construction it belongs to | Builder |
| ClearGround | clears the ground before construction takes place | - |
| Collect(Item) | different items waiting to be picked up and stored | - |
| Deliver | gets walkers to supply its receiver(Construction, Production, Market) with items | - |
| Demolish | removes the building/road it is on | - |
| Distribute | makes the walker roam and distribute food and wood on roads connected to the market | Peddler |
| Field | gets tilled in spring, grows on its own in summer and harvested in autumn | Farmer |
| GatherBerries | gets berries from bushes without destroying them, empty bushes regrow | Gatherer |
| HarvestBerries | turns bush structure into berries item, periodically created by gatherer building | - |
| HarvestRock | turns rock structure into stone item | - |
| HarvestTree | turns tree structure into log item | - |
| HarvestTreeF | turns tree structure into log item, periodically created by forester building | Forester |
| Path | adds point it is located on to roads | - |
| PlantTree | adds small tree that grows into full tree over time | Forester |
| Work | building efficiency and therefore production rate depends on walkers performing this task | Woodcutter/… |
Items
- Stone for building
- Log for building and producing wood
- Wood for warming up in houses, limited in the UI bottom right to make sure there are logs left for construction
- Potato for eating in houses
- Berry for eating in houses
How To 2D City Builder
permalink: /manual/two title: “2D City Builder” layout: single classes: ‘’ toc: true toc_label: “Chapters” toc_icon: city toc_sticky: true sidebar: title: “Manual” nav: manual —
Throughout the following steps we will create a very simple oldschool city builder from scratch using CCBK. Play an advanced version of it here.
This page covers only the first two evolutions, water and food. A completed version with all stages can be found in the CityBuilderManual project. I believe you will be able to figure the rest out after following the steps laid out here. Religion is very similar to water and pottery has just a slightly longer production chain than food.
Setup
- Create a new unity project using the 2D template (Built-In)
- Remove the Input System Package if installed
- Import TMP Essential Resources (Windows/TextMeshPro/…)
- Import the CCBK Core Framework
(Import the Asset normally, the video imports a custom package because it was made pre release)
- Generate a basic Sprite based Game (Window/CityBuilder/Setup)
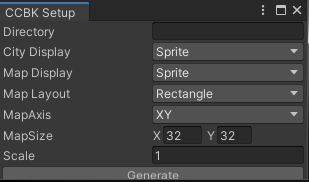
You are now left with a very basic but already runnable game. Save/Load, SpeedControls, Minimap and some other small features are already fully functional. The left bar contains Tools that can build a road and a building that spawns a walker on those roads as well as a demolish tool that destroys them. A single item has also been created that is used up when building.
Check out the Grid Object in the Scene to find stuff related to the grid and the tiles on it. See the Logic Object to see all kinds of Managers that are commonly used. The DefaultItemManager for example manages Items and has a setting that determines the items at the start of the game.
Various Assets have also been generated. The City folder holds all the different parts that make up a city in CCBK.
If you see any gaps between sprites try disabling Anti-Aliasing.
Map
- Place the Manual Assets inside your Assets folder
- Open the Tile Palette Tab found in Windows/2D
(install ‘2D Tilemap Editor’ from Package Manager if the window is missing)- Make sure your active Tilemap is ‘Ground’ and your Palette is ‘HTPalette’
- Draw your map inside the guide lines of the map(turn on gizmos if you cant see it)
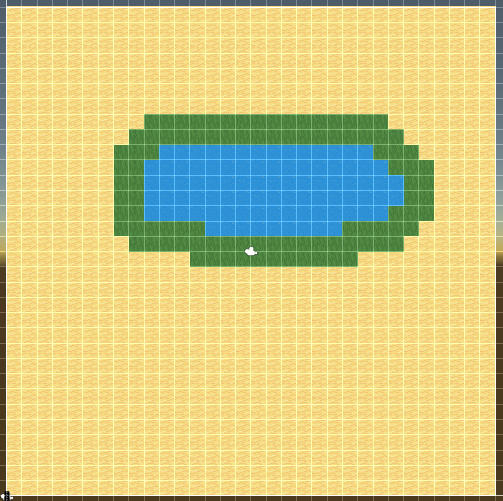
We’ll later add a water layer that spreads out two tiles from water. I’ ve drawn grass tiles there to communicate that to the player.
- On DefaultMap(Grid) replace the groundBlocked Tile in Walking- and Building Blocking Tiles with the same HTWater you just painted onto the ground TileMap
- Set Rotation to Mirror
- Find the RoadTool(UI/Tools)
- Replace its Background Image with HTRoadSN
- On the RoadTool itself click the Road to select it in the Project View
- Replace the Tile with HTRoad
When you start the game now you should be able to draw some nice connecting roads everywhere but on the water.
Water
Supply
- Find the HouseTool(UI/Tools)
- Rename it to WaterSupplyTool
- Replace its Background Image with HTWaterSupply
- Click the BuildingInfo on the BuildingBuilder to select it in the ProjectView
- Rename the BuildingInfo to WaterSupplyInfo
- Key > ‘WAT’ ; Name > ‘WaterSupply’
- Rename the Building Prefab to WaterSupply and open it
- Remove the WalkerSpawner Component
- On the SpriteRenderer of the Sprite Object set HTWaterSupply as the Sprite
- Create a Layer(RMB>Create/CityBuilder/Layer) in the City folder named ‘WaterLayer’
- In the Scene find the DefaultLayerManager(Logic) and add an affecting tile entry
-
Back in the WaterSupplyInfo add a BuildingRequirement
- Create a Service(RMB>Create/CityBuilder/Layer) in the City folder named ‘WaterService’
Carrier
- Open up the WalkerBase Asset
- On the Sprite Object add the following
- Animator (Controller > HTAnimator)
- UnityAnimatorEvent (Parameter > ‘walking’)
- UnityAnimatorEventVector (Parameter > ‘direction’ ; Set Y > TRUE)
- On the Sprite Object add the following
- Rename WalkerInfo(City/Walkers) to ‘WaterCarrierInfo’
- Rename the Walker Prefab to WaterCarrier and open it
- Sprite > HTCarrierD1 ; Animator > HTCarrier
- Replace the RoamingWalker Script with a ServiceWalker
- Service > WaterService ; Amount > 1000
- Hook WalkingChanged up to SetBool on the UnityAnimatorEvent(Sprite)
- Hook DirectionChanged up to SetVector3 on the UnityAnimatorEventVector(Sprite)
- On the WaterSupply Building Prefab add a ServiceWalkerComponent
- Walker > WaterCarrier ; Downtime > 5
You should now be able to place Water Supplies but only directly next to Water Tiles. They should spawn Water Carriers when connected to Roads that are correctly animated.
Food
Wheat
- Select the currently only Item(City/Items)
- Rename the Asset itself to Gold
- Key > ‘GOL’ ; Name > ‘Gold’
- Create an Empty Gameobject in your Scene
- Reset its Position
- Name it WheatVisual
- Drag the Sprites HTWheatG1-4 from Project View onto WheatVisual
- Order In Layer > 15
- Add a StorageQuantity Visual to WheatVisual
- Swap > TRUE ; Objects > HTWheatG1-4
- Drag WheatVisual into the Items folder and delete it from the Scene
- Create an Item(RMB>Create/CityBuilder/Item) named ‘Wheat’
- Key > ‘WHT’ ; Name > ‘Wheat’ ; UnitSize > 100
- Visuals > WheatVisual
- Add it to the Items Set by selecting it and clicking ‘Find in Folder’
Cart Pusher
- Open up the Walkers Window(Window/CityBuilder/Walkers)
- Copy WaterCarrier and call the new Walker ‘CartPusher’
- Open the Prefab by double clicking the preview image
- Sprite > HTPusherD1 ; Animator > HTPusher
- Replace the ServiceWalker Script with DeliveryWalker
Farm
- Open up the Buildings Window(Window/CityBuilder/Walkers)
- Copy WaterSupply with Key > FAM ; Name > Farm
- Open the Info by double clicking the entry
- Building Requirement - Mode > Average
- Size > 3x3
- Open the Prefab by double clicking the preview image
- Move Pivot X > 1.5 Y > 1.5
- Sprite > HTFarm
- Remove ServiceWalkerComponent
- Add ProductionComponent
- Interval > 20
- Add Items Producer
- Items Item > Wheat ; Quantity > 100
- Storage Mode > Free Unit Capped ; Capacity > 1
- DeliveryWalkers Prefab > CartPusher
- Drag the Sprites HTFarmProgress1-4 from Project View onto Sprite
- Reset the Positions and set Order In Layer > 15
- Add ProgressThresholdVisualizer
- Component > ProductionComponent ; Swap > TRUE
- Add 4 Elements to Progress Thresholds
- 0.2 > HTFarmProgress1 ; 0.4 > HTFarmProgress2
- 0.6 > HTFarmProgress3 ; 0.8 > HTFarmProgress4
- Back in the Scene find WaterSupplyTool(UI/Tools) and clone it
- Rename it to FarmTool
- BuildingBuilder BuildingInfo > FarmInfo
- Background Image > HTFarm
You should now be able to build Farms that visualize their progress and spawn walkers whenever they are done. We’ll take care of storage next so they will have somewhere to go.
Granary
- Open up the Buildings Window(Window/CityBuilder/Walkers)
- Copy WaterSupply with Key > GRN ; Name > Granary
- Open the Info by double clicking the entry
- Remove the Building Requirement
- Size > 4x4
- Open the Prefab by double clicking the preview image
- Move Pivot X > 2 Y > 2
- Sprite > HTGranary
- Remove ServiceWalkerComponent
- Add StorageComponent
- Storage Mode > Stacked ; Stack Count > 8 ; Capacity > 4
- Order Item > Wheat ; Ratio > 1
- Add StorageQuantityVisualizer
- Add 8 Transforms under the Sprite
- Move them to about the center of the granary openings
- Add the to the Origins Array
- Back in the Scene find WaterSupplyTool(UI/Tools) and clone it
- Rename it to GranaryTool
- BuildingBuilder BuildingInfo > GranaryInfo
- Background Image > HTGranary
The Farms Cart Pushers should now carry the Wheat to the Granary. The quantity stored in a Granary should be properly visualized.
Buyer & Seller
- Open up the Walkers Window(Window/CityBuilder/Walkers)
- Copy WaterCarrier and call the new Walker ‘BazaarBuyer’
- Open the Prefab by double clicking the preview image
- Sprite > HTBuyerD1 ; Animator > HTBuyer
- Replace the ServiceWalker Script with PurchaseWalker
- Storage Capacity > 3
- Open the Prefab by double clicking the preview image
- Copy WaterCarrier and call the new Walker ‘BazaarSeller’
- Open the Info by double clicking the entry
- PathType > RoadBlocked
- Open the Prefab by double clicking the preview image
- Sprite > HTSellerD1 ; Animator > HTSeller
- Replace the ServiceWalker Script with SaleWalker
- Open the Info by double clicking the entry
Bazaar
- Open up the Buildings Window(Window/CityBuilder/Walkers)
- Copy WaterSupply with Key > BAZ ; Name > Bazaar
- Open the Info by double clicking the entry
- Remove the Building Requirement
- Open the Prefab by double clicking the preview image
- Sprite > HTBazaar
- Remove ServiceWalkerComponent
- Add DistributionComponent
- Storage Capacity > 5
- Order Item > Wheat ; Ratio > 1
- Purchase Walker Prefab > BazaarBuyer
- Sale Walker Prefab > BazaarSeller ; Downtime > 5
- Minimum Order > 2
- Back in the Scene find WaterSupplyTool(UI/Tools) and clone it
- Rename it to BazaarTool
- BuildingBuilder BuildingInfo > BazaarInfo
- Background Image > HTBazaar
The Bazaar will do nothing but spawn Sellers for now. It will only send out Buyers once a Seller has reported that Buildings on its path need Wheat.
Peasants
Housing
- Create a Population(RMB>Create/CityBuilder/Population) in the City folder named ‘PeasantPopulation’
- Key > ‘PST’ ; Name > ‘Peasant’
- Open up the Buildings Window(Window/CityBuilder/Buildings)
- Copy Bazaar with Key > H1 ; Name > H1Hut
- Open the Prefab by double clicking the preview image
- Sprite > HTHut
- Remove DistributionComponent
- Add HousingComponent
- Add a Population Housing entry with Population > PeasantPopulation ; Quantity > 20
- Copy H1Hut with Key > H2 ; Name > H2Shanty
- Open the Prefab by double clicking the preview image
- Sprite > HTShanty
- Quantity > 35
- Copy H1Hut with Key > H3 ; Name > H3Cottage
- Open the Prefab by double clicking the preview image
- Sprite > HTCottage
- Quantity > 50
- Copy H1Hut with Key > H0 ; Name > H0Property
- Open the Prefab by double clicking the preview image
- Sprite > HTHousing
- Remove HousingComponent
- Add HousingPlaceholderComponent with Prefab > H1Hut
- Back in the Scene find WaterSupplyTool(UI/Tools) and clone it
- Rename it to HousingTool
- BuildingBuilder BuildingInfo > H0PropertyInfo
- Background Image > HTHut
Migration
- Open up the Walkers Window(Window/CityBuilder/Walkers)
- Copy WaterCarrier and call the new Walker ‘Immigrant’
- Open the Info by double clicking the entry
- PathType > MapGrid
- Open the Prefab by double clicking the preview image
- Sprite > HTMigrantD1 ; Animator > HTMigrant
- Replace the ServiceWalker Script with ImmigrationWalker
- Capacity > 10
- Open the Info by double clicking the entry
- Copy Immigrant and call the new Walker ‘Emigrant’
- Open the Prefab by double clicking the preview image
- Replace the ImmigrationWalker Script with EmigrationWalker
- Open the Prefab by double clicking the preview image
- On the Logic Object in the Scene add a Migration Component
- Immigration Walkers Prefab > Immigrant ; Count > 10
- Emigration Walkers Prefab > Emigrant ; Count > 10
- Entry > Logic ; Population > PeasantPopulation
- On the Logic Object add a DefaultPopulationManager
When you start the game now and build Housing the Migration should spawn Immigrants that occupy the properties and turn them into Huts.
Evolution
- Create an EvolutionSequence(RMB>Create/CityBuilder/EvolutionSequence) in the City folder named ‘HousingEvolution’
- 0 Building Info > H1HutInfo
- 1 Building Info > H2ShantyInfo Services > WaterService
- 2 Building Info > H3CottageInfo Items > Wheat
- Add Evolution Components to H1Hut, H2Shanty and H3Cottage with
- Evolution Sequence > HousingEvolution
- ServiceRecipient
- Service > WaterService ; Loss Per Second > 5
- ItemsRecipient(only H2 and H3)
- Item > Wheat ; Consumption Interval > 2
- Storage > Free Item Capped ; Capacity > 10
Your Huts should now turn into Shanty when a Water Carrier passes them. Once a BazaarSeller provides them with Wheat they should turn into Cottages. You might want to give yourself some more gold by increasing the Quantity in DefaultItemManager(Logic).
How To Custom Systems
permalink: /manual/custom title: “Custom Systems” sidebar: title: “Manual” nav: manual —
In this section i will walk you through creating a custom system in CCBK. The system itself is not especially useful but it contains implementations of all the most important parts of the framework.
A completed, playable version can be found in the Custom folder of the CityBuilderManual project within the CCBK asset.
Building Component
We will start off with a pretty basic building component. All it will do is keep a building effective for a certain duration and then disrupt it until it is reset.
Before actually creating the component let’s add an interface for the component so we can easily add other components for the same purpose or switch out the implementation. This step can be skipped, using the component directly instead of an interface works too.
public interface ICustomBuildingComponent : IBuildingComponent
{
    void DoSomething();
}
Next add a script that inherits from BuildingComponent and implements the interface.
public class CustomBuildingComponent : BuildingComponent
{
    public override string Key => "CCO";

    public GameObject GoodVisual;
    public GameObject BadVisual;

    public float Duration;

    private float _time;

    private void Update()
    {
        if (_time > 0)
        {
            _time -= Time.deltaTime;
        }

        GoodVisual.SetActive(IsWorking);
        BadVisual.SetActive(!IsWorking);
    }

    public void DoSomething()
    {
        _time = Duration;
    }
}
As you can see i’ve added the reset logic and some GameObjects for visualization. The Code is mandatory for building components and is used to identify the component in save/load. We’ll add the save logic next, put the following at the end of your script.
#region Saving
[Serializable]
public class CustomComponentData
{
    public float Time;
}

public override string SaveData()
{
    return JsonUtility.ToJson(new CustomComponentData()
    {
        Time = _time
    });
}
public override void LoadData(string json)
{
    var data = JsonUtility.FromJson<CustomComponentData>(json);

    _time = data.Time;
}
#endregion
As you can see saving usually contains a data class that stores all the runtime data of the component. The building component base class provides overridable save and load methods that are called by the building. Saving is optional, if the methods are not overridden or return empty not data will be saved.
The last thing we need is for the component to influence the buildings efficiency. We do this by implementing IEfficiencyFactor
public class CustomBuildingComponent : BuildingComponent, ICustomBuildingComponent, IEfficiencyFactor
{
    public override string Key => "CCO";

    public bool IsWorking => _time > 0;
    public float Factor => _time > 0 ? 1 : 0;
...
Building Trait
A BuildingTrait is a special BuildingComponent that always creates a Reference an is stored in a special collection within the BuildingManager. This is done so they can be retrieved without having to iterate through all the buildings on the map. The interface for it looks like this.
public interface ICustomBuildingTrait : IBuildingTrait<ICustomBuildingTrait>
{
    float CustomValue { get; }

    void DoSomething();
}
The minimal implementation for the Trait is similar to a normal component.
public class CustomBuildingTrait : BuildingComponent, ICustomBuildingTrait
{
    public override string Key => "CTR";

    public float CustomValue => 1;

    public BuildingComponentReference<ICustomBuildingTrait> Reference { get; set; }

    public override void InitializeComponent()
    {
        base.InitializeComponent();

        Reference = registerTrait<ICustomBuildingTrait>(this);
    }
    public override void OnReplacing(IBuilding replacement)
    {
        base.OnReplacing(replacement);

        var replacementTrait = replacement.GetBuildingComponent<ICustomBuildingTrait>();

        replaceTrait(this, replacementTrait);
    }
    public override void TerminateComponent()
    {
        base.TerminateComponent();

        deregisterTrait<ICustomBuildingTrait>(this);
    }

    public void DoSomething()
    {
        Debug.Log("Hello!");
    }
}
The major difference to normal components is that we have to manage a reference throughout the lifecycle of the component. It has to be created when the building is build, passed on when it is replaced and removed when the building gets demolished.
The purpose of the trait is to spawn walkers so we will return to it after creating some custom walkers.
Walker
The first walker we will add is a roaming walker that resets every ICustomBuildingComponent it passes.
CCBK has a base class called BuildingComponentWalker
public class CustomRoamingWalker : BuildingComponentWalker<ICustomBuildingComponent>
{
    protected override void onComponentEntered(ICustomBuildingComponent buildingComponent)
    {
        base.onComponentEntered(buildingComponent);

        buildingComponent.DoSomething();
    }
}
Thats it, whenever the walker passes a ICustomBuildingComponent onComponentEntered will be called. The base class also provides onComponentRemaining in case you want to do something as every frame the component is in reach instead of just the first one.
The second most prevalent kind of walker in city builder are destination walkers. The one we’ll add is fairly simple since it gets its path passed to it from outside. It will follow that path it is given and call a method on its target when it is finished.
public class CustomDestinationWalker : Walker
{
    public enum CustomDestinationWalkerState
    {
        Inactive = 0,
        Walking = 1
    }

    private CustomDestinationWalkerState _state = CustomDestinationWalkerState.Inactive;
    private BuildingComponentReference<ICustomBuildingTrait> _target;

    public void StartWalker(BuildingComponentPath<ICustomBuildingTrait> customPath)
    {
        _state = CustomDestinationWalkerState.Walking;
        _target = customPath.Component;
        walk(customPath.Path);
    }

    protected override void onFinished()
    {
        if (_target.HasInstance)
            _target.Instance.DoSomething();

        base.onFinished();
    }

    #region Saving
    [Serializable]
    public class DeliveryWalkerData
    {
        public WalkerData WalkerData;
        public int State;
        public BuildingComponentReferenceData Target;
    }

    public override string SaveData()
    {
        return JsonUtility.ToJson(new DeliveryWalkerData()
        {
            WalkerData = savewalkerData(),
            State = (int)_state,
            Target = _target.GetData()
        });
    }
    public override void LoadData(string json)
    {
        var data = JsonUtility.FromJson<DeliveryWalkerData>(json);

        loadWalkerData(data.WalkerData);

        _state = (CustomDestinationWalkerState)data.State;
        _target = data.Target.GetReference<ICustomBuildingTrait>();

        switch (_state)
        {
            case CustomDestinationWalkerState.Walking:
                continueWalk();
                break;
        }
    }
    #endregion
}
The _state variable is only added so the walker can be correctly restored when loading. The _target is stored so the walker can call DoSomething on it when it is reached.
The WalkerData field in the save data contains all the basic data of the walker like current position and path which enables you to just call continueWalk in Load.
WalkerSpawner
To actually spawn walkers from buildings CCBK uses something called in WalkerSpawner. These come in Cyclic, Pooled and Manual varieties and are serializable field that are added to building components. In Unity versions prior to 2020.1 generic fields do not get serialized which which is why you will see concrete spawner implementations at the end of all the walker classes in CCBK. If you are using such a version add the spawners to the walkers.
/// <summary>
/// concrete implementation for serialization, not needed starting unity 2020.1
/// </summary>
[Serializable]
public class ManualCustomRoamingWalkerSpawner : ManualWalkerSpawner<CustomRoamingWalker> { }
/// <summary>
/// concrete implementation for serialization, not needed starting unity 2020.1
/// </summary>
[Serializable]
public class CyclicCustomRoamingWalkerSpawner : CyclicWalkerSpawner<CustomRoamingWalker> { }
/// <summary>
/// concrete implementation for serialization, not needed starting unity 2020.1
/// </summary>
[Serializable]
public class PooledCustomRoamingWalkerSpawner : PooledWalkerSpawner<CustomRoamingWalker> { }
Now add the spawner to the building trait we created earlier.
public CyclicCustomRoamingWalkerSpawner CustomRoamingWalkers;
public CyclicCustomDestinationWalkerSpawner CustomDestinationWalkers;

private void Awake()
{
    CustomRoamingWalkers.Initialize(Building);
    CustomDestinationWalkers.Initialize(Building, destinationWalkerSpawning);
}
private void Update()
{
    if (Building.IsWorking)
    {
        CustomRoamingWalkers.Update();
        CustomDestinationWalkers.Update();
    }
}

private bool destinationWalkerSpawning(CustomDestinationWalker walker)
{
    var path = Dependencies.Get<ICustomManager>().GetPath(Building.BuildingReference, walker.PathType, walker.PathTag);
    if (path == null)
        return false;
    walker.StartWalker(path);
    return true;
}
Initialization and updating of the spawners is handled by the owning building component. Finding a path for the destination walker could be done directly in the component but we’ll move it out into a custom manager which we will create in the next chapter.
Manager
Managers are central scripts meant to orchestrate different systematic behaviors. Once again we’ll start by creating an interface.
public interface ICustomManager
{
    float GetTotalValue();
    BuildingComponentPath<ICustomBuildingTrait> GetPath(BuildingReference home, PathType pathType);

    void Add(BuildingComponentReference<ICustomBuildingTrait> trait);
    void Remove(BuildingComponentReference<ICustomBuildingTrait> trait);
}
The manager will be responsible for calculating a total from the CustomValue field of our traits. It will also provide the paths for our destination walkers. Lastly it will be notified when oue of our traits gets built or demolished. Let’ look at the implementation.
public class CustomManager : MonoBehaviour, ICustomManager
{
    public float Multiplier;

    private void Awake()
    {
        Dependencies.Register<ICustomManager>(this);
    }

    public float GetTotalValue()
    {
        return Dependencies.Get<IBuildingManager>().GetBuildingTraits<ICustomBuildingTrait>().Sum(t => t.CustomValue) * Multiplier;
    }
    public BuildingComponentPath<ICustomBuildingTrait> GetPath(BuildingReference home, PathType pathType)
    {
        foreach (var other in Dependencies.Get<IBuildingManager>().GetBuildingTraitReferences<ICustomBuildingTrait>())
        {
            if (other.Instance.Building == home.Instance)
                continue;

            var path = PathHelper.FindPath(home.Instance, other.Instance.Building, pathType);
            if (path == null)
                continue;

            return new BuildingComponentPath<ICustomBuildingTrait>(other, path);
        }

        return null;
    }

    public void Add(BuildingComponentReference<ICustomBuildingTrait> trait)
    {
        Debug.Log("Custom Trait Added!");
    }
    public void Remove(BuildingComponentReference<ICustomBuildingTrait> trait)
    {
        Debug.Log("Custom Trait Removed");
    }
}
To calculate the total value the manager pulls all the traits from the BuildingManager and applies a Multiplier. As mentioned before BuildingManager keeps track of all traits for quick retrieval.
For the path we just loop all traits and return the first one that PathHelper is able to calculate.
The Add and Remove Methods don’t have and function in this demonstration so we’ll just log to check if they work.
Score
To be able to use the total value calculated by the manager in visuals and win conditions we will now create a score. Scores are pretty straightforward ScriptableObjects that are implemented like this.
[CreateAssetMenu(menuName = "CityBuilder/Scores/" + nameof(CustomScore))]
public class CustomScore : Score
{
    public float Multiplier;

    public override int Calculate()
    {
        return Mathf.RoundToInt(Dependencies.Get<ICustomManager>().GetTotalValue() * Multiplier);
    }
}
To see the score add some kind of text to the scene in combination with a ScoreVisualizer. For the score to be calculated you need a ScoreCalculator in the scene. The ScoreCalculator pulls the Scores it has to calculated from a set of scores it retrieves from the Dependencies. To register your custom score for that add an ObjectRepository to the scene and give it a ScoreSet that contains the instance of score used in the visualizer.
General-Buildings
permalink: /manual/buildings title: “Buildings” sidebar: title: “Manual” nav: manual —
The bread and butter of every good city are, of course, buildings.
In CCBK Buildings do not define any actual behavior.
Instead they act as containers for components and addons that can be placed on the map.
For some examples of buildings being placed on a couple different maps check out the scenes located in …/CityBuilderCore.Tests/Other/BuildingPlayground.
Global properties of buildings like name, size, prefab and access type are stored in a ScriptableObject called BuildingInfo.
give buildings that spawn roamers a preferred access point to avoid annoying scenarios where roamers spawn wrong because a road was added
A system deeply embedded in buildings is the ability to replace them.
This can be used to change a buildings appearance and behavior by replacing it with another.
useful for evolving housing, upgradable towers, …
Anything interacting with a Building or one of its parts should not directly carry a reference to it. Instead a BuildingReference can be used which updates its reference when the building is replaced.
The different building parts can either interact directly of through the buildings efficiency.
eg farms growing wheat quicker based on land fertility or storages not accepting wares without enough workers
The efficiency is expressed through two values. IsWorking[bool] is meant to indicate whether the building is generally working or somehow disrupted. The Efficiency[float] expresses how well the building is working from 0-1.
An important field of the Building Component is the Pivot. The Pivot is a transform in the center and root of the Building. It is used to transform and rotate the Building and to place bars and other visuals over the building. If any of these things go wrong check that the Pivot is correctly assigned.
Core Building Components
High level overview of the core building components of CCBK and their walkers, mouse over a component for a short explanation.
Building Requirements
In CCBKs default implementations whether a building can be placed in a certain position is ultimately up to the tool placing it. The BuildingBuilder tool that is used for most buildings in the demos checks whether the cost defined in BuildingInfo can be payed and whether all the points are inside the maps boundaries. It also calls the BuildingInfo methods CheckBuildingAvailability for each individual point and CheckBuildingRequirements for every building.
By default CheckBuildingAvailability checks if the points are blocked by the map or a structure that occupies the same level. CheckBuildingRequirements on the other hand makes sure that all the BuildingRequirements and RoadRequirements defined on the BuildingInfo are fulfilled. Both of these can be overridden in inherited classes so if, for example, you need only one of the BuildingRequirements to be fulfilled you can create a custom BuildingInfo like this:
using CityBuilderCore;
using System.Linq;
using UnityEngine;

[CreateAssetMenu(menuName = "CityBuilder/" + nameof(BuildingInfoX))]
public class BuildingInfoX : BuildingInfo
{
    public override bool CheckBuildingRequirements(Vector2Int point, BuildingRotation rotation)
    {
        if (BuildingRequirements != null && BuildingRequirements.Length > 0 && BuildingRequirements.All(r => !r.IsFulfilled(point, Size, rotation)))
            return false;
        if (RoadRequirements != null && RoadRequirements.Length > 0 && RoadRequirements.All(r => !Dependencies.Get<IRoadManager>().CheckRequirement(rotation.RotateBuildingPoint(point, r.Point, Size), r)))
            return false;
        return true;
    }
}
When you look at a BuildingRequirement in the inspector, the top fields(Mode, Points, Count) define how success for the entire building is determined while the lower(Map, Building) sections define how the individual points are checked. Basically the points of the building are checked against the lower portion and whether that allows placing the building is determined by the upper parameters. For a good example of this check out the differences between the GraniteMineInfo and the IronMineInfo in the three demo.
The RoadRequirement lets you specify that certain points of a building need to be placed on a road. A simple example of this is the RoadBlockerInfo which just needs its single point to be placed on any kind of road. The StageInfo is a bit more advanced since it needs certain points to be placed on the upgraded STR stage of the roads.
General-Walkers
permalink: /manual/walkers title: “Walkers” sidebar: title: “Manual” nav: manual —
The primary way to move things about in CCBK.
storage workers moving items, hunters collecting meat, architects inspecting buildings
An important field of the Walker Component is the Pivot. The Pivot is a transform in the center and root of the Walker. It is used to transform and rotate the Walker. If any of these things go wrong check that the Pivot is correctly assigned.
Path Types
Among other base functions Walkers have a setting for PathType in their WalkerInfo which specifies the kind of pathfinding it will use to get to its destination.
Check out the scenes in …/CityBuilderCore.Tests/Other/MovementPlayground for interactable examples!
Road
Simple A* Pathfinding inside the road network on the map. Usually used for all kinds of destination walkers.
carriers delivering goods, workers walking to a monument site, …
RoadBlocked
Same as Road but points with RoadBlockers are removed. Usually used for all kinds of roaming walkers.
water carrier distributing out water,
Map
This Pathfinding uses Unity NavMesh. All demo scenes have a gameobject called Navigation that is used purely to generate the NavMesh. To change the NavMesh follow these steps.
- activate Navigation gameobject
- adjust the objects inside Navigation
- make sure Navigation Area is correctly set to Walkable/Not Walkable
- bake the NavMesh
- deactivate Navigation gameobject
If you want the walker to use a NavMeshAgent instead of strictly following the path you can assign one to the Agent field.(as seen in MovementPlaygroundMap test scene)
immigrants walking to their new homes, hunters walking to pray, …
MapGrid
Simple A* pathfinding of all points on the map that are not occupied. Only feasible for small maps, on larger maps use Map pathfinding instead.
Path Tags
The Path Tag field on WalkerInfos can be used to pass any kind of Object along to Pathfinding. The following ways to use this are already built into CCBK.
WalkerInfo
PathType: RoadBlocked
Either assign the WalkerInfo itself to the field or check the Path Tag Self checkbox to send the WalkerInfo itself to Pathfinding. By using the checkbox an additional Object can be assigned to the Path Tag field.
For example the Three demo has RoadBlocker buildings with RoadBlockerComponent components that block off certain WalkerInfos that can be changed in a dialog window.
Road
PathType: Road
By using a MultiRoadManager instead of the DefaultRoadManager and creating Networks for each Road it is possible to have multiple road networks that can even overlap. The Road object assigned to the walkers Path Tag then decides which network a walker can use. If the Path Tag is left empty in this scenario the walker can use any network.
The Urban Demo uses this for the Road and Rail Networks. The Urban Demo also has an example of road switching in an extra scene called Tunnel which demonstrated the RoadSwitcherComponent that can be used to switch walkers between different RoadNetworks. Keep in mind that the start- and endpoint has to be on the same network.
Multi roading is also demonstrated in the MultiRoadDebugging test scene. (/CityBuilderCore.Tests/City/Movements/MultiRoadDebugging.unity)
Tile
PathType: MapGrid
The DefaultStructureManager has a field called PathOptions which can be used to define additional Pathfinding Networks on the Map. These Networks differ from the normal one either by only using certain GroundOptions(Tiles) or by restricting the level of structures that block it. The Tag on the path option has to match the one in the WalkerInfo for it to be used. This could technically be anything but one of the Tiles is probably intuitive.
Structure pathing is demonstrated in the StructurePathDebugging test scene. (Assets/SoftLeitner/CityBuilderCore.Tests/City/Movements/StructurePathDebugging.unity)
Walker Modes
The walker base class includes helper methods for various modes of walking. These save their states automatically and can easily be continued on loading.
Walk
Directly pass a WalkingPath for the Walker to follow it immediately.
used when the path is checked before the walker is even spawned like storage walkers
TryWalk
Tells the walker to try to find a way to a target or give up after a certain time. The walker can be given a target building or position to check pathfinding by itself or a function that returns one.
deliver walkers spawned by production are spawned and have to figure out a path afterwards
Roaming
The walker randomly walks around while trying to avoid points already visited. It does for a set number of steps specified in Range, how many positions it remembers is defined in Memory.
well workers handing out water, bazaar workers selling food
Wander
Moves to a random adjacent point
homeless walkers
WalkerAction
These allow encapsulating the state and logic of an action a walker can take. A series of these actions can be started as a process on a walker which will then perform them in order. For example a lot of the tasks in the town demo use a WalkPointAction followed by some animated action like WaitAnimatedAction.
In the earlier demos(three, defense, urban) walkers were more or less single purpose so the actions they take are baked into the implementation of the walker. The newer town demo uses a single walker to perform a wide variety of actions which is why this higher level way of controlling them was created.
To create an action with new custom logic simply create a class that derives from WalkerAction. For a minimal example check out the WaitAction which simply waits for a set duration before letting the process continue(or finish if it’s the last one).
The persistence of walker actions is a bit atypical for CCBK, instead of having some save method that returns their state they are directly serialized. This means that [Serializable] and [SerializeField] attributes have to be set up and fields that can’t be directly serialized have to be converted using ISerializationCallbackReceiver. A simple example of this can be found in WalkBuildingAction which has a reference to a building which has to be turned into an id for serialization.
General-Layers
permalink: /manual/layers title: “Layers” sidebar: title: “Manual” nav: manual —
Layers define numeric values for every point on the map.
resources like water and ore, desirability of buildings or even the spreading heat from fires
At the start of the game a layers base values are calculated using predefined tiles. After that LayerAffecters can register with the layer system to add their own values.
Here are some of the ways Layers interact with other systems
- requirement for building or evolution
wells need a minimum amount of water, housing needs desirability to evolve
- (working-)affecter on building
eg gardens affecting desirability, working stages affect entertainment
- layer efficiency component affecting building efficiency
fertility on farm buildings,
- multiplier for risk increase and service decrease
fires happen faster in hotter positions and more water is consumed
General-Connections
permalink: /manual/connections title: “Connections” sidebar: title: “Manual” nav: manual —
Connections define networks of values made up of feeders, passers and consumers.
water that spreads through pipes or the reach of services through roads
Similar to layers, types of connections are defined by creating a Connection asset from RMB/Create/CityBuilder/Connection. The Connection asset has Layer, Layer Range and Layer Falloff fields which allow the connection to act as a LayerAffector. The Urban Demo uses this for a water layer that spreads out from the connection. It also has a power connection that is directly used without a layer. For another simple example of connections check out the ConnectionPlayground in the CityBuilderCore.Tests folder.
Passers
The the most basic piece of a connection, theirs points pass on values and both feeders and consumers are just variants of passers. A ConnectionPasserStructure is used in the ConnectionPlayground to spread a connection through a road network(found by key). The same component also spreads power and water through StructureTiles in the urban demo. The houses in the urban demo have a ConnectionPasserComponent that spreads power through the buildings.
Consumers
Consumers are special passers that only receive value but don’t actually pass them further. In the ConnectionPlayground this is used so that only buildings directly connected to the road receive connection but not buildings that connect to them. They use a ConnectionPasserComponent for this with the IsConsumer field checked.
Feeders
Feeders are where values within connections spread out from. Both the urban demo and the playground use the ConnectionFeederComponent on buildings(pump, power station) but other components to feed from structures or tiles are also available. The feeder component has fields for the max value in the points of the feeder and the range and falloff in the connected passers.
Systems-Resources
permalink: /manual/resources title: “Resources” sidebar: title: “Manual” nav: manual —
The different resource systems deal with creating, moving and consuming items. Items are ScriptableObjects that specify how the item is visualized in storage and UI among other settings.
wood, meat, clay, iron, …
Items are stored in the ItemStorage class which can limit how many items they fit by item quantity, item units or stacks. ItemStorages are either part of building components or a global manager. ItemsStorages on Buildings can be set to global mode so their items go to global storage instead.
gold is stored in global storage, food is stored in buildings
The two essential interfaces regarding resources are IItemReceiver and IItemGiver.
- Item receivers are building component that accept items from others.
Other components deliver items to receivers. - Item givers are building components that provide certain items for others.
Other components acquire items from givers.
Storage
Storage Components act as both receivers and givers. They need a StorageOrder for every Item they store. Storage components performs actions in the following order.
- get items with StorageOrderMode GET from other givers
- supply receivers with a higher priority with items(production)
- empty items with StorageOrderMode EMPTY to other receivers
silos, storage yards, …
Production
As long as it is supplied with items specified in ItemsConsumers a production component will periodically use up those and produce the items specified in ItemsProducers. It does not actively get the consumer items but instead registers as an IItemsReceiver. It does however spawn delivery walkers to move produced items to other receivers.
barley farm, brewery, clay pit, potter, …
Distribution
These components send out roaming Sale Walkers that take note of the items IItemRecipients it passes need. They then look for IItemGivers that give out those items and send Purchase Walkers to get them. The Sale Walkers are filled up with items whenever they leave and pass out the items to the IItemRecipient they pass.
markets
Retrieval
Retrieval Components periodically send out walkers that get items from the closest dispenser. They then spawn delivery walkers that try to move them to an items receiver.
hunting lodge, wood cutter, …
Collection
Collection Components spawn walkers that collect items from generation components the pass while roaming. These also use delivery walkers to move the collected items on.
tax collector
Systems-People
permalink: /manual/people title: “People” sidebar: title: “Manual” nav: manual —
CCBK supports multiple classes of citizens, create a Population ScriptableObject for each one. Different populations may be able to fill different job openings or pay different tax rates.
plebs, scholars, aristocrats, …
Housing
Housing components provide space for a specified number of a defined population. Migrations control how fast new citizens arrive or leave based on their sentiment value.
One migration script per population is needed which allows different rates of immi-/emigration per population as well as different entry points on the map.
Employment
Directly sustained by the population is the employment system.
Individual Buildings either always have full access to the employment pool or they send out an EmploymentWalker that checks if any buildings housing the needed population are nearby.
Employment is mostly used to drive building efficiency.
It is possible to define different groups of employment to specify which buildings get employees first.
essentials like water should not cease operation because ore mining is using up its employees
CCBK comes with a dialog that allows the user to change employment priorities at runtime.
Workers
The worker system is not directly liked to populations but will most likely be effected by building employment/efficiency.
Some buildings need trained workers to function effectively which creates a slightly different kind of production chain.
farms, monuments, …
Systems-Services
permalink: /manual/services title: “Services” sidebar: title: “Manual” nav: manual —
Services are values on Buildings that decrease over time and influence building efficiency and evolution. ServiceWalkers roam around filling the Service values of ServiceRecipients they pass.
water access, religion, education, …
Systems-Risks
permalink: /manual/risks title: “Risks” sidebar: title: “Manual” nav: manual —
Risks are values on Buildings that increase over time and cause some event when full. RiskWalkers roam around reducing the Risk values of RiskRecipients they pass.
fire, collapse, disease
CCBK comes with Risks that add Addons to Buildings or replace the Building with other structures or Buildings.
To add Risks that execute other actions simply inherit from Risk and implement the Execute and Resolve methods.
Systems-Monuments
permalink: /manual/monuments title: “Monuments” sidebar: title: “Manual” nav: manual —
Monuments are buildings that take time, resources and workers depending on their current stage of construction. They are supplied by the Worker System and, unlike other worker users, provide the workers with a path to their respective work places inside the site when they arrive.
The created building does not necessarily have to be a monument, monument sites can be used for any building that needs time and resources to be built instead of being instantly plopped down.
Systems-Attacks
permalink: /manual/attacks title: “Attacks” sidebar: title: “Manual” nav: manual —
The attack system coming with CCBK provides the features needed for basic tower defense functionality. While it is prominently featured in the Defense Demo.
The IHealther interface is used to display the health bars.
i’d love to see a city builder with tower defense mechanics
Systems-Timings
permalink: /manual/timings title: “Timings” sidebar: title: “Manual” nav: manual —
This system provides interactions with the current Playtime.
time display in years, days, ..
happenings like catastrophes or blessings
time based weather and lighting
Units
Created using ContextMenu > CityBuilder-TimingUnit these determine how the playtime is partitioned. TimingUnits can be repeating(DayOfWeek, Month, …) or endless(Year). Use the PlaytimeVisual to visualize the progress of a TimingUnit in the UI.
Happenings
Various events that happen at predefined times. Some Happenings have a one off effect at their start or end while others may be active for a period. The different Happenings coming with CCBK can be found in ContextMenu > CityBuilder-Happenings. They are then added to Missions along with a condition that determines when they happen. This means that a Happening may be reused a number of times throughout missions. Adding a title and description to a happening may trigger a dialog at the happenings start or end that display them.
Happenings are relatively easy to extend. Create a new script and derive from the TimingHappening base class. For a Happening that executes once at its start or end override Start or End, for an ongoing effect override Activate and Deactivate.(ie rain from hour 2-3 is an Activate/Deactivate, an earthquake that destroy some buildings at the start of hour 2 uses Start) Check out all the existing Happenings in CityBuilderCore.Systems.Timings.Happenings for examples.
Other-Structures
permalink: /manual/structures title: “Structures” sidebar: title: “Manual” nav: manual —
A structure is basically anything that is placed on the map.
The default structure manager stores basic structures in a dictionary based on the position, so checking and retrieving structures when the position is known is fast. This has the downside that only one regular structure can be stored per position. Since only Buildings are stored this way in Core CCBK this is not a problem.
StructureCollections and Tiles are always stored separately and Roads register themselves as underlying structures which also stored them in a separate list.
Structures are defined by the points they occupy on the map as well as three bit flags:
- IsDestructible
Specifies whether the structure can be removed by the player - IsDecorator
Decorator structures are automatically removed when something is built on top of them - IsWalkable
Whether the MapGrid Pathing Type includes the points of the structure
All structures implement the IStructure interface, the linked API page can give you an overview of the available components. Structures are often placed on the map using a tool like the BuildingBuilder, RoadBuilder or StructureBuilder.
Roads
The DefaultRoadManager is a special structure that includes all the points that are filled out in the TileMap on the GameObject and does pathfinding between them. It is possible to define multiple Roads with different Stages that work similar to Building Evolutions.
simple paths turn into prettier streets when the desirability of the area improves
StructureCollections
A collection of GameObjects that interact with the map somehow.
Only one kind of GameObject is allowed per collection and the prefab has to be specified. This is done so the Structures can be restored after the game is loaded.
3D - trees, rocks, rubble, walls…
StructureTiles
Similar to StructureCollections but using Tiles instead of GameObjects.
2D - trees, rocks, rubble, walls…
Buildings
see Buildings
Other-Dependencies
permalink: /manual/dependencies title: “Dependencies” sidebar: title: “Manual” nav: manual —
Dependencies in CCBK are used similarly to IOC Containers in other areas of development. The implementation however is stripped down to a minimum to accommodate the performance needs of games.
Basically Dependencies allow the registration and retrieval of interfaces. This allows the implementation to be changed and moved without having to rewire all entities that depend on it.
Most systems in CCBK have some central manager component that all the components need access to. Theses managers are not wired up in the editor or implemented as singletons.
Instead the system includes an interface for that manager. The Behaviour that actually implements the interface calls Register on Dependencies when it awakens in the scene. Any components that need the manager call Get on Dependencies.
When possible keep changes to CCBK to a minimum. Instead remove the default implementation from the scene and add your own.
Let’s say you wanted to change how the production components are prioritized for delivered raw materials.
- copy DefaultItemManager to the project folder and rename it to something like MyProjectItemManager
- change the code to fit your project
- replace the item manager in the scene
- pro tip: switch to debug mode in the inspector and replace the script to keep the field values
Many of the default managers register multiple interfaces for convenience, these can be easily split up thanks to the Dependency system. To replace just one of those interfaces with a custom implementation comment out the line in Awake where that interface is registered. That change will be lost if the Asset is upgraded but should be easy enough to restore.
Dependencies are automatically cleared between scenes.
All interfaces registered with Dependencies are effectively singletons. A possible extension of the system would be passing a tag when registering and getting to partition different areas of dependencies(eg different road managers for underground, ground and sky). CCBK does not include such an extension to keep performance optimal for those that do not need it.
Other-Scores
permalink: /manual/scores title: “Scores” sidebar: title: “Manual” nav: manual —
Scores represent all kinds of numerically quantifiable values for a city.
They are used for displaying statistics to the player and checking win conditions.
The different Score Scripts each implement a way of calculating a score value. They are available as ScriptableObjects in the CityBuilder/Scores Context Menu.
You can easily create your own scores by inheriting from Score and implementing the Calculate Method.
Some of the Scores included in CCBK are:
Average Building Score
Calculates the average value from different values assigned to Buildings
Tent:0 Hut:50 Palace:100 > 1xTent 2xHut 2xPalace = 60 Housing Quality
Average Service/Risk Score
Averages out the risk/service value of a defined building category
how well are housings supplied with water, whats the general risk of collapse across my city, …
Building, Item, Population Score
Just counts the number of a building that exist.
how many pyramids have been built, how many diamonds stored, how many plebs live in town, …
Coverage Score
Calculates the number of people buildings would cover against the current population count
1 temple covers 1x100 , 2 shrines cover 2x50 > population=400 => 50% Coverage
Multiplied, Summed, Threshold Score
can be used to transform other scores
culture = entertainment + monuments, different threshold of employment, …
Other-Views
permalink: /manual/views title: “Views” sidebar: title: “Manual” nav: manual —
Views can be used to alter the way the world looks and for presenting additional information to the player. In the Three and Urban Demos they are activated and deactivated in the UI using a ViewActivator. In the Defense Demo only one View exists that is always supposed to be active so it is assigned as the DefaultView in the DefaultViewManager.
Views are ScriptableObjects which are found in the ContextMenu > CityBuilder-Views-…
The following Views are included in CCBK.
- Composite
Placeholder for multiple other Views(only one view is active at a time in IViewsManager) - Culling
Applies a LayerMask to the main camera - Layer
Visualizes the values of a layer on the map using IOverlayManager - Connection
Visualizes the values of a connection on the map using IOverlayManager - Efficiency
Visualizes the efficiency of Buildings map using IOverlayManager - BuildingBars
Visualizes an IBuildingValue by adding a BuildingValueBar for appropriate Buildings using IBarManager - WalkerBars
Visualizes an IWalkerValue by adding a WalkerValueBar for appropriate Walkers using IBarManager
To create your own View just derive from View and override the Activate and Deactivate Methods.
Values
IBuildingValue and IWalkerValue are used to query Builders and and Walkers for certain numbers. For example the implementation of IWalkerValue on the Item ScriptableObject returns the item quantity that the pertaining walker carries. Most Values are implemented in ScriptableObjects(Risks, Services, Items, …). A good Example for a Value that is implemented on the View instead is the IHealther Interface.
Bars
Bars initiated by the Building-/WalkerBars Views and managed by the IBarManager are the visual representation of a IBuildingValue or IWalkerValue. They are not specific to a certain Value but rather just translate the number returned by the Value to a viewable form. When a BarView is activated the IBarManager instantiates Bars in all the appropriate entities.
Creating a new Bar is done by deriving from BuildingValueBar or WalkerValueBar. These base classes provide all the necessary Methods to get the Values(HasValue, GetMaximum, GetValue, ….)
Other-Misc
permalink: /manual/misc title: “Misc” sidebar: title: “Manual” nav: manual —
Saving
CCBK includes a complete save and load system that serializes save data using unity’s json serializer. The save data containers and save/load logic can generally be found in ‘#region Saving’ at the end of the respective script.
Save-/LoadData are perpetuated through the different systems starting at the central manager scripts. This means core components of CCBK like building components and walkers already have overridable Save/Load Methods that will be called without any extra work.
The easiest way to hook data that is outside of CCBK into the save system is to inherit from ExtraDataBehaviour. The default game manager finds all those in its awake Method.
Mission Parameters
Mission, Difficulty and MissionParameters are a proposal for managing different scenarios in your game.
Mission and Difficulty are Scriptable Objects that can be defined in the Editor.
MissionParameters includes all parameters needed to start a game and are passed to the IMissionManager when the scene is loaded.